转盘

Each composition can contain a number of decks, which you can use to manage your videos, still images, audio files and sources.
Decks are like the records in a DJs record bag. Keep them organised so you can always reach for the right selection.
Decks are accessed through the set of buttons just below the clip layers. Each deck has a name. When you select a deck, all of the clips in the deck are displayed in their layers.

Tip! If you're really adverse to clicking with the mouse, you can assign shortcuts to these two little fellas in the far right of the deck area and scroll through.
Adding Content
Before you can start having fun with your content, you need to get it into Arena or Avenue. You can do this by dragging and dropping files from your operating system file browser or you can do it using the built-in browser.
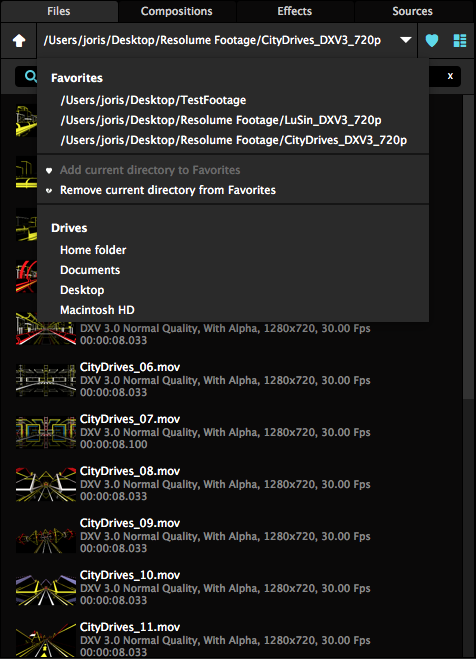 You will find the browser over to the right of the display, in the Files tab.
The main part of the browser enables you to browse through folders by double clicking them.
Tip! If you need to search through a long list of files and you already know the name of the file or folder you're looking for, type the name into the search box to narrow down the list of possible suspects.
Click the dropdown at the top to show a list of root drives on your system, as well as a list of favourites. You can add or remove items from the favourites list via the big heart icon in the top right.
Next to the heart is a toggle that enables you to show or hide thumbnail images for media files - really useful when you can't quite remember what you called that fantastic clip you made last night! Also, you can double-click a clip name to preview it in the preview window, to be really really sure that it is the fantastic clip you made last night.
Loading media into a clip is simply a case of dragging it over to a slot in the deck. You can drag an audio file and a video clip or image file onto the same slot to make a combined clip. If you do this, Resolume will automatically transpose the video to the length of the audio to make an audio-visual clip.
Check out the Preparing Media page for tips on optimising your content for Resolume.
Managing Clips
Think of clips like words in a sentence.
Just like using different words can drastically change the meaning of a sentence, using different clips together can drastically change your output. Sometimes some words don't even make any sense at all. So you also want to keep clips together that, when used together, create something awesome.
This is where decks come in.
When you have some clips that work well together, you put them in a single deck. That way you can keep them together and always access them.
You can arrange clips by theme ("all the space clips"), color ("all the blue clips"), rhythm ("all the slow clips"), type ("all the audio-reactive clips") or whatever you think makes sense.
The point is that managing your clips is super important to playing a good show.
Tip! The same clip can be used more than once in another deck, or even more than once in the same deck. This way that trippy kaleidoscope clip can be part of your 'Psychedelic' deck, but also your 'Colorful' deck and also your 'Backgrounds' deck.
Once clips have been added to a deck, you can move them around by clicking and dragging the clip name below the thumbnail of each clip. If you drag a clip over an already added clip, they will swap places in the deck. You can also drag a clip just to the right or left of another clip. This will insert the dragged clip next to it, and shift over the others to make room for it.
If you want to copy a clip, drag the clip to the new position and then hold down the Ctrl key (⌥ on a Mac) as you release the mouse button. A copy of the clip will be created and the original will remain. You can also use the universal copy, cut and paste commands CTRL-c/v/x (⌘ on a Mac), allowing you to paste a clip into a different deck as well. You can even use shift and CTRL/⌘ to select multiple clips and copy/paste multiple clips at the same time!
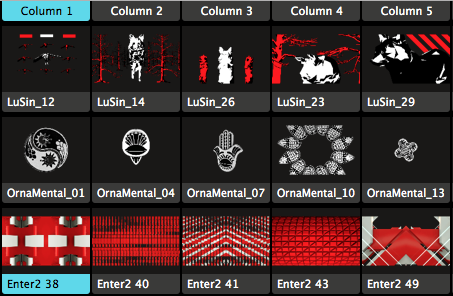
Tip! A good way to organise content is to have similar clips next to each other on the same layer. A layer is a horizontal row of clip slots. This way, you can easily select different clips without breaking the visual theme.
You can also organise your content so that clips that look good when played together are all in the same column. A column is a vertical row of clip slots. Then you can play them all at the same time by triggering the column, using the column itself as the trigger.
Using Decks
Instead of loading a whole composition with all its decks, single decks can be added to the current composition as well. Just double click the deck in the Composition browser. It will then be added to the current composition as a new deck.
Very useful for those inevitable moments half way through your set, when you realise you feel like playing content you didn't prepare.
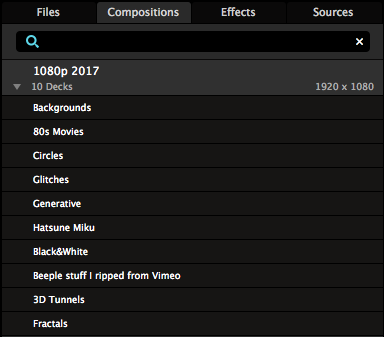 A good way to be prepared for those moments, is to keep one or more 'master compositions'. These master compositions are not meant for a single performance, but rather contain your footage, pre-organized per theme. For instance, one master comp could contain all your 1080p material.
Every time you have some new 1080p content, you open the 1080p comp and add a new deck with the new material. Or you could, of course, add the material to already existing decks if they fit the theme of that deck.
At this point, you can also set clips to be BPM Sync or Timeline, apply effects to clips, and arrange clips together in columns.
After you've added the new footage, save the comp, close it and leave it be.
Then, during performance, when you realise you feel like playing a certain set of clips, you don't have to search your computer for them, or add and set them up during show. You can just double-click its deck in your master comp, and it will load for you in your current show composition, with all the clips in the right place with the right settings.
Organising Decks
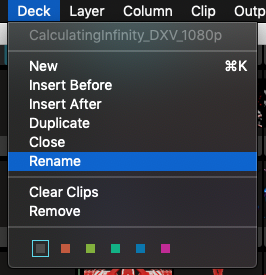 A new deck can be created by using the Deck > New or Deck > Insert Before or After menu options. The New option adds the new deck to the end of the list while the Insert option adds it before or after the currently selected deck. You can also duplicate the current deck.
To change the order of decks, just drag em around.
Closing a deck will remove a deck from view, but keep its contents intact and it will remain part of the composition. It will remain closed until you open it again.
By default, when you add the first file to a deck, it will get the name of the folder that contains that file. If that doesn't mean anything to you, you can use the Rename option to give it a more meaningful name.
Clear Clips will clear a deck of all its contents, but keeps the empty deck open. Removing a deck will delete it in its entirety.
You can also use color coding to mark your decks more clearly.
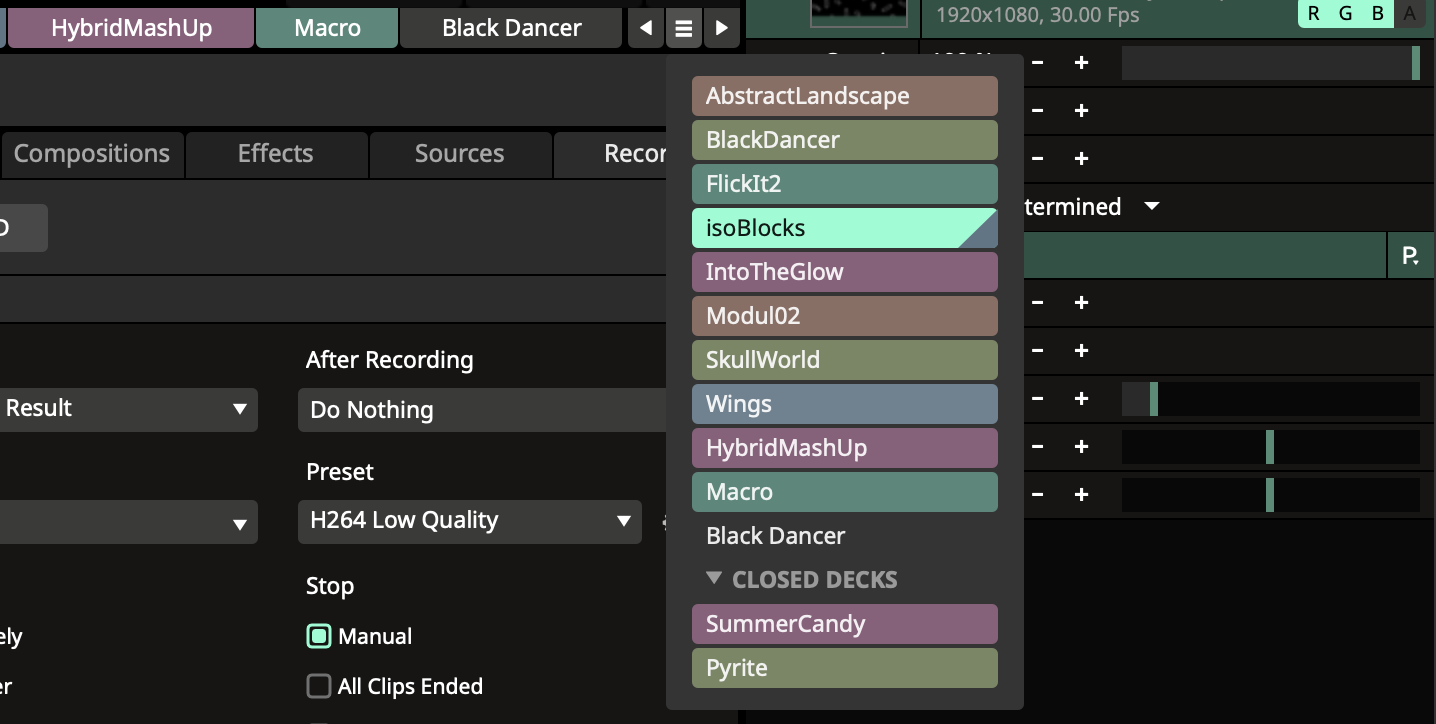
The deck menu can be found in-between the deck scroll buttons.
Hitting the hamburger-looking icon will open up the deck menu.
The menu allows quick acces to all your open and closed decks.