MIDI Shortcuts
Wenn man Resolume mit der Maus steuert, kann man jeden Parameter gezielt erreichen und präzise einstellen. Aber bei einer Live Performance braucht man mehr Kontrolle als dies mit der Maus möglich ist. Manchmal muss eine ganz bestimmte Aktion zu einem ganz bestimmten Zeitpunkt stattfinden, ohne dass man mit der Maus erst scrollen und suchen muss. Und genau hierfür wurden Tastenkürzel (oder noch allgemeiner: Shortcuts) erfunden.
Mit Hilfe von Shortcuts kann man einer Taste der Computertastatur oder des MIDI Controllers eine Steuerfunktion in Resolume zuweisen. So wie STRG-C und STRG-V übliche Tastenkürzel für Kopieren & Einfügen sind. Nur kann man jetzt seine Shortcuts selbst definieren.
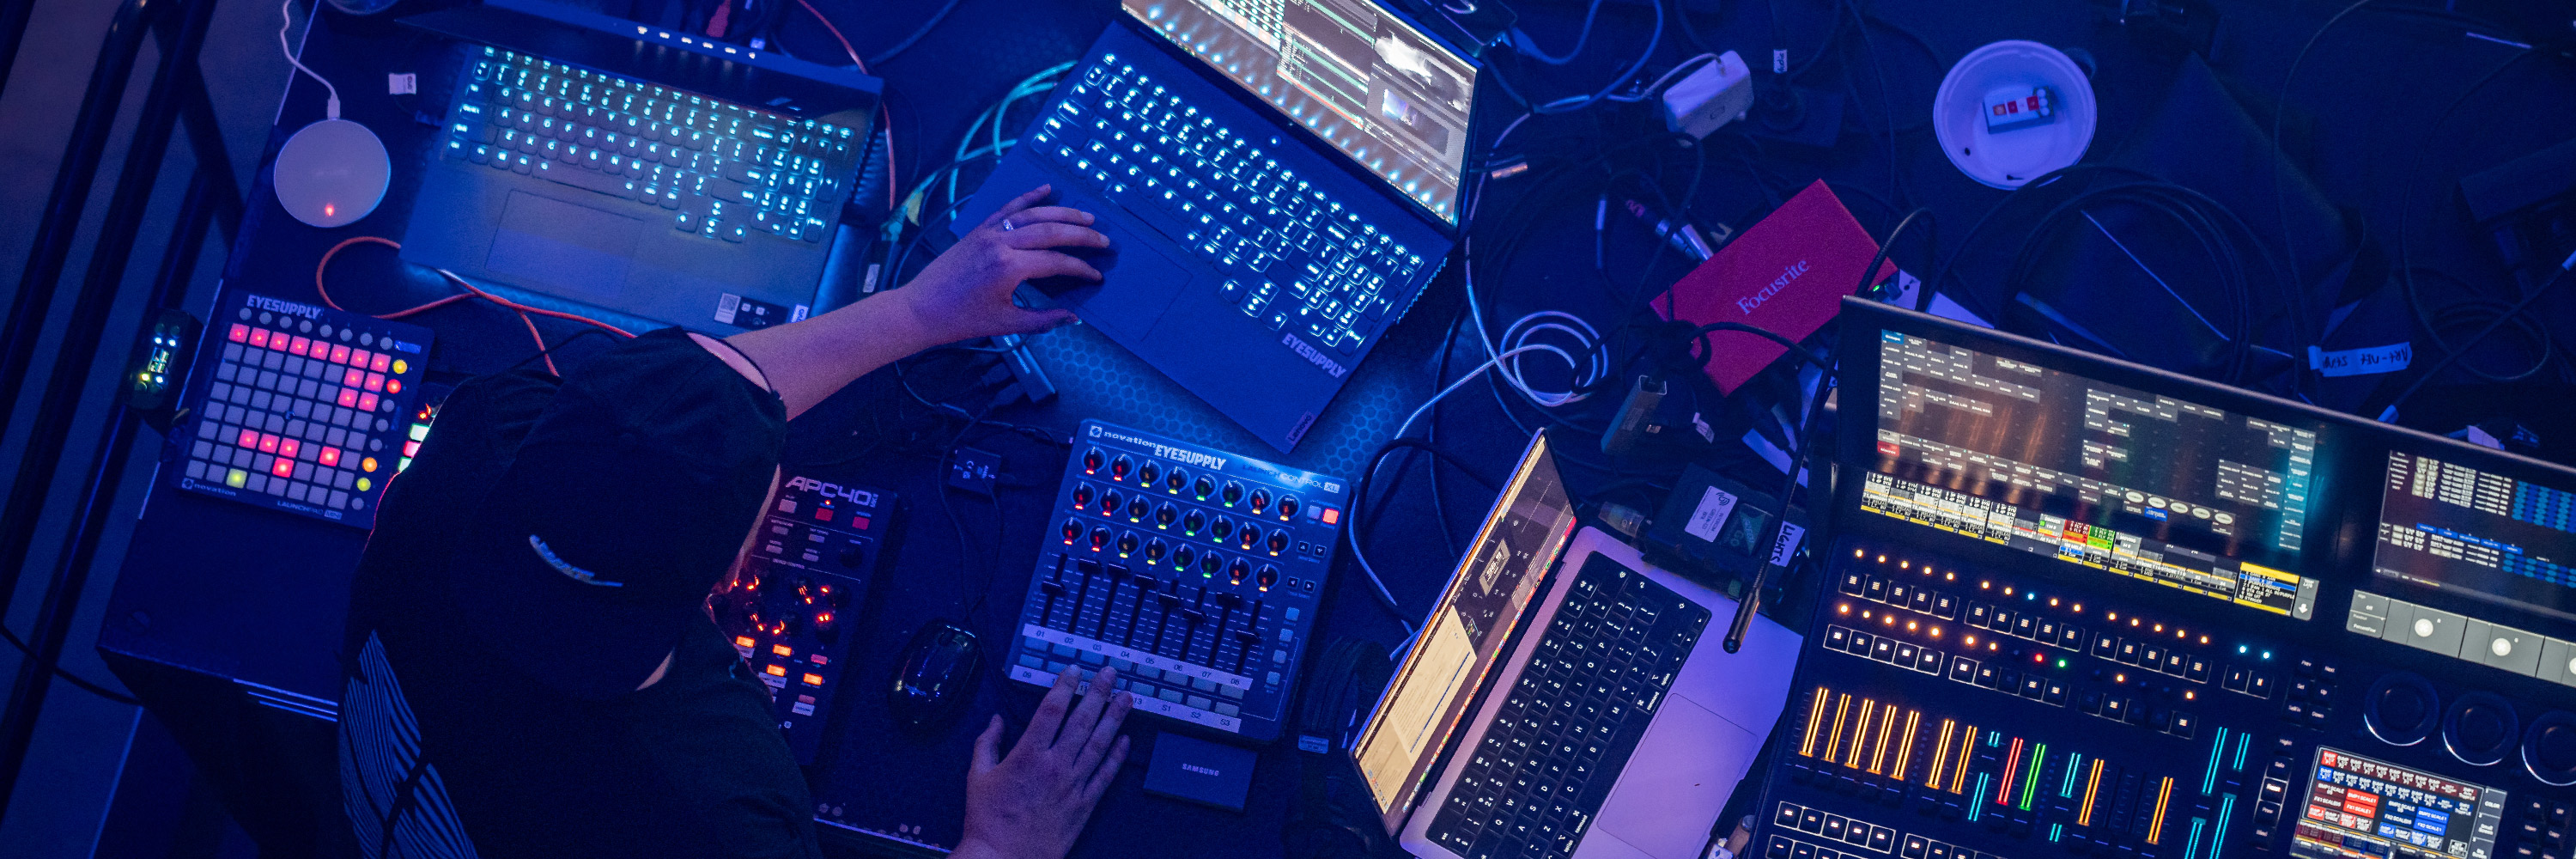
Resolume unterstützt externe Steuerungen via Computertastatur, MIDI Controller und OSC-Meldungen. Bei Arena kann man auch DMX-Eingaben von einem Lighting Desk (Lichtmixer) nutzen.
In diesem Kapitel zeigen wir Ihnen, wie man Resolume mit einem MIDI Controller steuert.
MIDI Shortcuts zuweisen
Man kann Shortcuts für einen MIDI Controller auf die gleiche Weise zuweisen wie Shortcuts für die Computertastatur.
 Man muss Resolume nur zuerst darüber informieren, dass man einen MIDI Controller angeschlossen hat. Hierfür nutzt man das MIDI Tab der Voreinstellungen.
Hier müssen Sie zunächst nur MIDI-Eingang und MIDI-Ausgang des verwendeten Geräts einschalten. Das ist alles. Um den Rest kümmern wir uns später.
Tipp! Sie wissen nicht, ob Ihr MIDI Controller überhaupt funktioniert? Klappen Sie einfach den MIDI Monitor auf der rechten Seite der MIDI Voreinstellungen auf. Resolume zeigt Ihnen alle MIDI Meldungen, die es von allen aktivierten Controllern empfängt. Wenn Meldungen eingehen, aber Resolume nicht darauf reagiert, stimmt etwas mit Ihrer Shortcut-Einrichtung nicht. Wenn gar nichts angezeigt wird, stimmt etwas mit Ihrem MIDI Controller nicht.

Beginnen wir mit einem einfachen Shortcut. Wir wollen ein Tastenkürzel für den Blackout Button, der bei Aktivierung die gesamte Ausgabe auf Schwarz schaltet. So eine Art Panik-Button (wenn alles zu viel wird) oder um die Spannung vor einem besonderen Video-Effekt zu erhöhen.
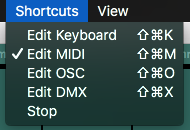
Hierfür öffnet man das Tastenkürzel-Menü und wählt, für welches Protokoll man einen Shortcut erstellen möchte.
Das Interface wechselt die Farbe. Für MIDI Shortcuts haben wir ein nettes pastellfarbenes Cyan gewählt.
Schalter

Man kann allen cyanfarbigen Elementen einen Shortcut zuweisen. Finden Sie also den Composition Bypass Button oben links im Interface und klicken Sie ihn an.
Drücken Sie jetzt den Regler, den Sie dafür verwenden möchten. Am besten eine Taste, die auf Ihrem Controller leicht zu finden ist. Vielleicht sogar, ohne auf den Controller hinabsehen zu müssen. Etwa an den Ecken oder so?
Drücken Sie die gewünschte Taste und schon ist der erste Shortcut zugewiesen! Wenn der Bypass Button groß genug war, kann man sogar lesen, welcher Shortcut ihm zugewiesen wurde.
Drücken Sie die Escape-Taste, um den Shortcut-Modus zu verlassen. Jetzt können Sie mit Ihrem Shortcut die Composition Bypass-Funktion ein- und ausschalten, sooft Sie möchten.
Piano-Modus
Tauchen wir etwas tiefer in die Materie ein. Kehren Sie zum Shortcut-Modus zurück und wählen Sie nochmals Composition Bypass. Unten rechts im Interface sieht man das Shortcuts Tab, das nur im Shortcuts-Modus sichtbar ist. Auf diesem Tab sind alle Shortcuts in einer praktischen Liste aufgeführt.
Sie können auch verschiedene Optionen für Ihre markierte Steuerung wählen.
Es wird auch einiges über Kanäle, Noten und Midi-Ausgabe angezeigt. Darum kümmern wir uns später.

Im Moment interessiert uns nur die Option "Piano". In Resolume kann man alle Buttons auf den Piano-Modus einstellen, in dem die Buttons nur so lange eingeschaltet sind, wie man sie gedrückt hält, und ausgeschaltet werden, sobald man sie loslässt.
"Aber Resolume, so funktioniert ein Piano doch gar nicht!" Ja, das stimmt. „Piano“ ist aber leicht zu merken und erinnert Sie daran, dass Sie ein Instrument spielen. Sie können diese Option bei Bedarf auch ganz anders nennen.
 Wenn Sie den Piano-Modus für einen Shortcut aktiviert haben, können Sie die Funktionsweise mit der Option Invert auch umkehren. Dadurch wird der Regler bei gedrückt gehaltenem Button AUSgeschaltet und beim Loslassen EINgeschaltet.
Nerd-Alarm! Aus irgendeinem obskuren Grund senden manche Controller (etwa NanoKontrol) beim Drücken einer Taste CC- an Stelle von Noten-Meldungen. Die technischen Details möchte ich Ihnen ersparen. Abhilfe: Wenn der Shortcut für Ihre Taste CC an Stelle von Note anzeigt und keine Piano- und Invert-Optionen erscheinen, ändern Sie den Modus einfach in Taste (Button) und alles passt.
Bereich
Wenn man einen Button Shortcut einem Slider-Parameter zuweist, wird es noch interessanter. Aber richten wir zum Ausprobieren erst einmal einen Spaß-Parameter ein.

Wenden Sie den Invert RGB-Effekt auf einen Clip an. Lassen Sie alle Parameter unverändert und setzen Sie nur den Blend-Modus des Effekts auf TimeSwitcher. Jetzt können Sie den invertierten Clip als Stroboskop einsetzen und mit dem Opacity-Parameter die Rate steuern. Ziemlich cool, oder?
Wechseln Sie jetzt in den Shortcuts-Modus und weisen Sie Opacity des Invert RGB-Effekts einen Shortcut zu. Wählen Sie eine Taste auf Ihrem Controller, die Sinn macht.
 Im Shortcuts-Tab erscheinen neue Optionen. Die wichtigste ist ein großer Slider namens "Range". Sie weisen jetzt einem Slider einen Button Shortcut zu, wobei ein Slider mehr Werte hat als Ein und Aus. An der Range-Option können Sie erkennen, zu welchen Werten der Slider beim Drücken und Loslassen der Taste springen sollte.
Setzen wir die Werte auf 0 und 0.10. Sie können die In- und Out-Punkte entweder mit der Maus ziehen oder die Werte anklicken und numerisch eingeben. Nach dem Verlassen des Shortcut-Modus können Sie jetzt mit der ] Taste den Clip mit 10 % Deckkraft als Stroboskop einsetzen und wieder ausschalten. Braaaaap!
In diesem Modus gibt es auch die Piano-Option. Br-Br-Braaaap!
Value
 Mit einer Taste kann man nicht nur umschalten, sondern auch einen Slider direkt auf einen bestimmten Wert setzen. Im Shortcuts Panel kann man hierfür den Modus von Toggle auf Value setzen. Keine Sorge, auf Velocity kommen wir auch noch zu sprechen. Nur Geduld, Frischling.

Im Value-Modus kann man einen Slider mit dem Controller auf einen bestimmten Wert setzen. Also kann man mit einem Tastendruck den Opacity-Parameter von Invert RGB auf 0.10 setzen, ganz gleich auf welchen Wert er vorher eingestellt war. Sehr praktisch, um einen Parameter auf einen bestimmten Wert zurückzusetzen.
Mehrfache Shortcuts

Mehrfache Shortcuts sind superpraktisch! Man kann einem Parameter mehr als einen Shortcut zuweisen. Einfach den Shortcut wählen, rechtsklicken und 'Duplicate Shortcut' wählen.
Jetzt wird Ihr Shortcut zweimal verwendet. Indem man einen davon anklickt, wird er gewählt und Sie können ihn durch Drücken einer anderen Taste beliebig verändern.

Jede Shortcut-Taste kann jetzt eine andere Einstellung haben.
Beispiel: Wir setzen beide Tasten auf Toggle Mode bei aktivierter Piano-Option. Wir stellen den Bereich (Range) des ersten Shortcuts auf 0 und 0.05 und den Bereich des zweiten Shortcuts auf 0 und 0.1 ein. Jetzt kann man den Invert-Effekt mit unterschiedlichen Raten als Stroboskop verwenden. Da Piano aktiviert und der Minimalbereich bei beiden Shortcuts 0 beträgt, wird der Effekt beim Loslassen einer der Tasten immer ausgeschaltet.

Tipp! Wenn Sie Ihr Publikum nicht ständig mit epileptischem Strobing blenden möchten, können Sie mit mehrfachen Shortcuts auch den Hue-Parameter eines Colorize-Effekts auf bestimmte Werte setzen und so schnell die Farbe des Videos auf die Farbe der Lichtquellen abstimmen.
Shortcut-Ziel
Wenn Sie Shortcuts Clip Triggern oder Reglern auf den Ebenen-, Clip- oder Gruppen-Panels zuweisen, sehen Sie diese Target-Option (Ziel). Die Target-Option informiert Resolume genau darüber, wie Sie den Shortcut anwenden möchten. Es gibt drei Modi:
By Position

Dieses Ziel wendet den Shortcut einfach auf die Reihenfolge an, in der sich die Clips oder Ebenen befinden. Dies ist der Standard-Modus für Shortcuts auf den Ebenen- und Gruppen-Panels.
Beispiel: Shortcuts für Ebenen-Deckkraft sind standardmäßig auf „By Position“ gesetzt. Weil man wahrscheinlich immer mit dem ersten Fader des MIDI Controllers die erste Ebene der Komposition steuern möchte, ganz gleich wie man die Ebenen danach neu anordnet.
This Clip, Layer oder Group

Dieses Ziel wendet den Shortcut auf diesen bestimmten Clip bzw. die Ebene oder Gruppe an, ganz gleich wohin sie verschoben werden.
Auf diese Weise kann man einen Shortcut so zuweisen, dass er immer einen bestimmten Clip triggert, etwa einen Color Flash. Es spielt keine Rolle, ob dieser Clip auf Ebene 1, Spalte 1 oder Ebene 27, Spalte 95 liegt. Er wird immer von diesem bestimmten Shortcut getriggert.
Achtung! Wenn man diesen speziellen Clip bzw. die Ebene oder Gruppe löscht, verschwindet natürlich auch der Shortcut!
Selected Clip, Layer oder Group
 Dieses Ziel wendet den Shortcut immer auf den aktuell gewählten Clip bzw. die Ebene oder Gruppe an. Dies ist immer der Clip bzw. die Ebene oder Gruppe, der aktuell im jeweiligen Panel angezeigt wird. Dies ist das voreingestellte Ziel für alle Shortcuts, die man auf dem Clip Panel anwendet.
Moment? Was?
"Hallo, Resolume! Warum ist das so kompliziert? Ich will einfach alles einrichten und mich nicht mehr darum kümmern müssen. Für so etwas hat niemand Zeit! Sag mir, was ich tun soll!"
Wenn Sie sich nicht sicher sind, was das alles zu bedeuten hat, bleiben Sie bei allen Ihren Shortcuts einfach bei 'By Position'. Das macht am meisten Sinn, wenn Sie mit einem festen Controller Layout arbeiten.
Das 'Selected' Ziel bietet viele Möglichkeiten zum Optimieren der Controller-Konfiguration, aber man muss einen genauen Überblick behalten.
Mit dem 'This' Ziel wird man normalerweise nur ein spezielles Element in einer bestimmten Show steuern wollen.
Shortcut-Gruppen
Shortcuts-Gruppen werden auf eine Gruppe von Schaltknöpfen oder auf ein Dropdown-Menü angewandt. Schaltknöpfe (Radio Buttons) und Dropdown-Menüs werden detailliert und mit Beispielen auf der Parameter-Seite erklärt.

Die auf diesen Reglertyp angewendeten Shortcuts sind ein Sonderfall. Ein normaler Regler hat meistens nur zwei Optionen, Ein oder Aus. Shortcut-Gruppen haben wesentlich mehr.
Clip-Richtungsregler haben vier Optionen: Vorwärts, Rückwärts, Pause und Random. Der Autopilot hat ebenfalls vier. Die Ebenen-Überlagerungs-Modi haben noch wesentlich mehr Optionen.
Wenn Sie diesen Reglern Shortcuts zuweisen, werden die Dinge komplex und Sie entwickeln sich zu einem wahren Shortcut-Connaisseur. Hm formidable …
Direct

Zunächst kann man einen Shortcut direkt einem bestimmten „Element“ zuweisen. Beispiel: Man weist eine Taste zu, die den Clip vorwärts abspielt, und weist eine andere Taste zu, die den Clip rückwärts abspielt.
Hierzu wählen Sie die Buttons einfach im Interface und weisen ihnen eine Taste zu. Welcher Zustand zugewiesen ist, sieht man in der Mode-Box.
Auf die gleiche Weise könnte man Shortcuts für jede bevorzugte Ebenen-Überlagerung (Layer Blend Mode) oder die Auto Size-Optionen der Ebene zuweisen.
Piano
Wenn man einem Element direkt einen Shortcut zuweist, ist Piano auch als Option verfügbar. Bei aktivierter Piano-Option wird beim Drücken des Shortcuts zu diesem Element gewechselt und beim Loslassen zu der vorherigen Einstellung zurückgekehrt.
Auf diese Weise kann man den Clip bei einem besonders hektischen Musikabschnitt auf Random-Wiedergabe schalten und danach die Taste loslassen, um zur zuvor gewählten Abspielrichtung zurückzukehren.
Next/Previous/Random
Mit den Optionen „Select Next Item“, „Select Previous Item“ und „Random Item“ wird alles noch etwas verrückter. Mit ihnen kann man alle Elemente in dieser Reglergruppe zyklisch durchgehen.
Beispiel: Man kann alle Ebenen-Überlagerungen zyklisch durchgehen und die gleiche Taste so lange drücken, bis man die gewünschte Option gefunden hat.
Spezielle Elemente zyklisch durchgehen
Um noch tiefer in die Shortcut-Steuerung einzutauchen, können Sie einen Shortcut auch duplizieren und einem anderen Element in einer Gruppe zuweisen.
Beispiel: Man kann die gleiche Taste der Abspielrichtung Vorwärts und Rückwärts zuweisen und mit jedem Tastendruck zwischen diesen beiden Optionen umschalten. Die Ninjas unter den Anwendern können sogar noch zusätzlich den Piano-Modus aktivieren.
Man kann beliebig viele Elemente der gleichen Taste zuweisen. Resolume wechselt bei jedem Tastendruck zyklisch zum nächsten zugewiesenen Element.
CCs verwenden
Man kann einer Gruppe auch MIDI CC Shortcuts zuweisen, um jede Option in der Gruppe zyklisch durchzugehen. In den meisten Fällen macht das nicht viel Sinn, aber es kann Spaß machen, alle Ebenen-Überlagerungen zyklisch mit einem Drehregler durchzugehen.
 Vor den Clip Triggern gibt es eine spezielle Shortcut-Gruppe. Sie erscheint, wenn man in den MIDI Shortcut-Modus schaltet. Wenn man dieser Gruppe einen Shortcut zuweist, kann man alle Clips dieser Ebene mit nur einem Regler triggern. Wenn man einen MIDI CC zuweist, kann man Clip 1 bis 128 triggern, indem man unterschiedliche Werte auf dem gleichen CC sendet.
Tipp! Dies funktioniert auch mit Spalten.
MIDI-spezifische Modi
Wenn Sie Shortcuts für den Einsatz mit einem MIDI Controller zuweisen, können Sie auch einige Spezialmodi nutzen. Welche Modi verfügbar sind, richtet sich danach, ob Sie eine MIDI Note-Meldung oder eine MIDI Control Change (CC)-Meldung zuweisen.
Tipp! Bei jeder MIDI-Meldung kann man deren Channel- und CC- oder Note-Werte ändern. Wenn Sie sich auskennen, kann man damit die zum Shortcut gehörige MIDI-Meldung manuell ändern. Wenn Sie nur Shortcuts für Ihren Controller zuweisen, müssen Sie sich darum nicht kümmern.
MIDI CC-Optionen
MIDI Control Change klingt sehr beeindruckend, aber eigentlich sendet man damit nur Werte zwischen 0 und 127 von einem Fader oder Drehregler. Bei der Zuweisung eines MIDI CC Shortcuts sind die Optionen Absolute, Button, Relative und Fake Relative verfügbar.
Absolute

'Absolute' ist ziemlich unkompliziert. Man kann damit einfach den Wertbereich des Parameters mit dem Regelbereich des Faders oder Drehreglers steuern. Dieser Modus wird bei den meisten standard MIDI Controllern verwendet.
Beispiel: Im Absolute-Modus kann man einem MIDI Fader die Deckkraft einer Ebene zuweisen. Schiebt man den Fader hoch, wird die Ebene vollständig sichtbar. Schiebt man den Fader herunter, wird die Ebene unsichtbar. Habe ich das nicht gründlich erklärt?
Bei Bedarf kann man dieses Verhalten umkehren, oder einen speziellen Bereich einstellen.
Button

Button ist etwas bizarr.
Manche MIDI Controller, wie die Korg NanoKontrol-Serie, können beim Drücken einer Taste CCs senden. Logisch gesehen, macht das wenig Sinn, aber Korg wird sich wohl etwas dabei gedacht haben.
Im Button-Modus kann man Resolume darüber informieren, dass dieser CC von einer Taste gesendet wird. Resolume denkt dann nicht mehr, dass Sie einen Fader bewegen, und Sie erhalten Zugriff auf alle coolen tasten-spezifischen Modi wie Toggle und Value.
Relative

Manche Drehregler senden zwischen 0 auf der linken Seite und 127 auf der rechten Seite keine festen Werte. Anstatt an dem jeweiligen Ende anzuhalten, kann man die Regler endlos in beide Richtungen drehen, wobei sie weiterhin verschiedene Werte senden. Beispiel: Der APC40 MK1 hat über dem Master Fader einen relativen Drehregler. Der MK2 hat sogar zwei – der zweite befindet sich oben rechts neben der Tap-Taste.
Dies ist praktisch zum präzisen Einstellen von Parametern mit großem Wertbereich, etwa Position X und Y oder BPM. Mit diesem Reglertyp kann man auch lustige Sachen machen und beispielsweise den Abspielkopf scratchen.
Wenn Ihr Controller über einen derartigen Drehregler verfügt, sollten Sie ihn auf den Relative-Modus einstellen.
Im Relative-Modus kann man die Ansprache des Drehreglers beeinflussen und die Anzahl an Steps ändern, die der Regler steuert, oder den Step Size-Wert bei jeder Drehung des Reglers. Da diese Regler voneinander abhängen, wird bei einer Änderung an einem Regler der andere automatisch aktualisiert. Grundsätzlich bedeutet ein höherer Step Size-Wert weniger Steps und eine stärkere Wertänderung beim Drehen des Reglers. Ein kleinerer Step Size-Wert bedeutet mehr Steps und eine geringere Wertänderung.
Bei aktivierter Loop-Option springt der Parameter beim Erreichen des Endes an den Anfang zurück, wodurch Sie endlos weiterdrehen können. Der Shortcut lässt sich mit Invert auch umkehren.
Fake Relative
Fake Relative ist keine dubiose Person, die auf Parties behauptet, Ihr Onkel zu sein.
Die Drehregler mancher Controller kann man endlos drehen, obwohl sie keine relativen Drehregler sind. Stattdessen senden sie reguläre Werte zwischen 0 ganz links und 127 ganz rechts und man sollte sie wie normale Absolute-Drehregler verwenden.
Diese Art von Regler gibt es beim MK1 und MK2 der APC40-Serie.
Mit Fake Relative kann man diese Drehregler glauben lassen, dass sie eigentlich endlose relative Regler sind und so alle Optionen nutzen, die es im regulären Relative-Modus gibt.
MIDI Note-Optionen
MIDI Notes sind Meldungen, die etwas ein- oder ausschalten. Sie werden normalerweise von den Tasten oder Pads Ihres MIDI Controllers gesendet. Bei manchen Controllern können sie auch 'Velocity'-Werte (Anschlagdynamik) für die Stärke des Tastenanschlags übertragen.
Da MIDI Note-Meldungen sich nicht wesentlich von denen der Tastatur unterscheiden, gibt es auch die gleichen Optionen für Toggle, Piano, Range und Value. Mit ihnen kann man fast alles abdecken.
Velocity
Velocity ist ein Spezialmodus. Wenn es Ihre Controller unterstützen, können Sie bei jedem Tastendruck auch Velocity-Werte senden. Je härter Sie die Taste anschlagen, desto höher ist der Velocity-Wert.

Im Velocity-Modus kann man mit Range auch den Bereich einstellen. So könnte man spaßeshalber mit einem Tastendruck die Skalierung eines Clips ändern. Je härter man die Taste anschlägt, desto größer wird der Clip – mit einem Maximum von 200 %. Beim Loslassen der Taste fällt er auf 100 % zurück.
MIDI Clock

MIDI Clock gehört eigentlich nicht in dieses Kapitel. Das ist kein Shortcut, sondern eher ein Mittel, um Resolume zu anderen Geräten oder Anwendungen zu synchronisieren. Da MIDI Clock kein Shortcut ist, stellt man sie im MIDI Tab der Voreinstellungen ein.
Das Prinzip ist einfach. Beispiel: Sie spielen mit einem Musiker zusammen, der Ableton Live verwendet, und sie wollen beide mit dem gleichen BPM-Wert arbeiten. Wenn dann einer schneller performt, folgt der andere automatisch.
Eine Möglichkeit hierfür ist MIDI Clock. Ihr Musiker-Buddy kann bei Ableton die MIDI Clock-Ausgabe aktivieren (dort heißt es Sync) und sie via MIDI-Kabel, virtuellem MIDI Port oder sogar via Netzwerk zu Ihnen übertragen. Resolume wird die Clock empfangen und Ihre Sets synchronisieren.
Das MIDI Clock Protokoll besteht aus einigen Befehlen, von denen die wichtigsten Clock Tick, Clock Start und Clock Stop sind.
Wenn man Clock Input zum ersten Mal für ein Gerät aktiviert, wartet Resolume auf das Clock Start-Signal. Die meisten Geräte senden das Signal, wenn man die Play-Taste drückt.
Dann achtet Resolume auf jeden Clock Tick. Dieser wird bei jedem Beat von der Master-Anwendung gesendet. Resolumes BPM folgt dem Tick, als würde man den Beat mit der Hand klopfen. Die ganze Zeit. Automatisch.
Über das Dropdown-Menü kann man entscheiden, wie sich Resolume beim Empfang einer Clock Stop-Meldung verhält. Im 'Start/Stop'-Modus stoppt Resolume die BPM, wenn der Master stoppt. Im 'Switch to Manual'-Modus läuft Resolume weiter, auch wenn der Master einen Stopp-Befehl gesendet hat.
Tipp! 1996 war die MIDI Clock großartig. Aber sie ist notorisch flatterig und nicht wirklich präzise. Heutzutage liefert Ableton's Link Protokoll ein sehr viel kompakteres Sync-Signal, das zudem einfacher einzurichten ist.
MIDI Out
Mögen Sie nette Farben auf Ihrem MIDI Controller? Na klar. Und schon beginnt der Spaß.
Viele moderne MIDI Controller haben farbige Pads. Indem Sie den zum Controller gesendeten Velocity-Wert ändern, ändern Sie die Farbe des Pads.
Tipp! Wir bieten Nachschlagetabellen für die meisten Controller, bei denen Sie die Farbe des Pads wählen können, anstatt herausfinden zu müssen, welcher Velocity-Wert welche Farbe erzeugt. Für den APC40Mk2 haben wir sogar Vorschau-Farbfelder!

Für einen einfachen Toggle- oder Value-Shortcut kann man wählen, welcher Velocity-Wert für die Ein- und Aus-Zustände gesendet wird.
Mit Clip Trigger-Shortcuts geht der Spaß erst richtig los. Wie sich herausstellt, kann ein Clip in Resolume 5 Zustände haben. Daher können Sie wählen, welche Farbe für jeden Zustand gesendet wird.

Mehrere MIDI-Geräte
Vielleicht sind Sie ein großer Hardware-Fan und besitzen mehrere MIDI Controller. Etwa zwei Korg Nanopads für zusätzliche Trigger. Oder zwei APC40s um Eindruck zu machen. Oder Sie drehen gern an Knöpfen und haben vier farbkodierte Conspiracies. Warum auch immer, Sie haben Ihre Ticks und das ist cool.
Resolume kann unterscheiden, von welchem Gerät eine MIDI-Meldung kommt. Man kann also mit den einzelnen Geräten unterschiedlche Dinge steuern, sogar wenn die Geräte die gleiche MIDI-Meldung auf dem gleichen Kanal senden.
Man braucht keine Bome Software oder Editoren, um Kanäle zu ändern usw.
Beispiel: Sie haben zwei  APC40s angeschlossen. Sie können bei jedem APC auf der gleichen Taste Shortcuts zum Triggern unterschiedlicher Clips zuweisen. Resolume erkennt, auf welchem Gerät die Taste gedrückt wurde und triggert den entsprechenden Clip.
Warnhinweis! Wir unterscheiden die beiden Geräte, indem wir einen APC als den ersten und den anderen als den zweiten markieren. Kriterium ist hierbei die Reihenfolge, in der sie von Resolume erkannt werden, und nicht irgendein Unterschied bei den Geräten. Malen Sie also bitte keine große 1 und 2 aufs Gerät in der Erwartung, dass Resolume dies beachtet. Wenn Sie das nächste Mal die Anschlussreihenfolge ändern und der zweite APC als erster erkannt wird, werden die Shortcuts vertauscht.
Dies funktioniert auch bei Geräten unterschiedlicher Marken, die den gleichen Kanal oder die gleichen Noten verwenden. Ihr Launchpad XL kann friedlich neben Ihrem Traktor F1 existieren, obwohl beide den gleichen Notenbereich senden.
Oder aber ....
Wenn Ihnen das lieber ist, können Sie auch die Eingabe (Input) von 'Any Device' aktivieren. Dann unterscheidet Resolume nicht, sondern behandelt alle Geräte gleich.
MIDI Output
 Das gleiche gilt für MIDI Output. Wenn man einen MIDI Shortcut auf einem bestimmten Gerät erstellt, sendet Resolume standardmäßig Feedback nur an dieses Gerät. So können Sie eine Taste an einem Controller drücken, ohne dabei die Farben an einem anderen Controller zu ändern.
Bei Bedarf können Sie das Routing über das Output Dropdown-Menü ändern und das Feedback zu einem bestimmten anderen Gerät senden. Man kann Feedback sogar zu allen Geräten (All Devices) senden, was in komplexeren Setups als Kontrolle nützlich sein kann.
Man kann MIDI Output auch für einen bestimmten Shortcut komplett deaktivieren, was bei der Verwendung mehrerer Shortcuts für die gleiche Funktion oder in komplexeren Steuerumgebungen besonders praktisch ist.
Tipp! Wenn Input Device und Output Device auf das gleiche Gerät eingestellt sind und Sie den Eingang wechseln, ändert Resolume den Ausgang automatisch für Sie. Manche Gerät verwenden leider unterschiedliche Namen für ihre Input- und Output-Ports. In diesen Fällen müssen Sie sich selbst helfen.
Shortcut-Vorlagen
Man kann für jeden Shortcut-Modus Vorlagen speichern. So kann man unterschiedliche Layout- und Shortcut-Zuweisungen für unterschiedliche Gelegenheiten speichern und abrufen.
Beispiel: Ein Geräte-Freak kann sich für jeden Controller unterschiedliche Vorlagen erstellen. Ein normaler Mensch kann sich für den gleichen Controller unterschiedliche Layouts erstellen, um damit unterschiedliche Typen von Shows zu spielen. Oder man erstellt eine separate Vorlage für eine spezielle AV-Show mit einem befreundeten Musiker. Die Möglichkeiten sind unbegrenzt.

Jeder zugewiesene Shortcut wird automatisch in der aktuellen Vorlage gespeichert. Man kann Vorlagen über das Dropdown-Menü des Tastenkürzel-Panels wechseln. Hier kann man seine Vorlagen auch über die Optionen Neu.../ Speichern unter.../ Entfernen und Umbenennen... am unteren Rand der Liste verwalten.
Vorlagen sind einfach auf dem Computer gespeicherte XML-Dateien. Man kann Vorlagen zwischen Computern tauschen, an seine VJ-Freunde weitergeben oder mit anderen Resolume-Nutzern in unserem Forum teilen.
Ist die Vorlage gewählt, werden alle ihre zugewiesenen Shortcuts in einer Liste angezeigt.

Diese Liste enthält jeden aktuell zugewiesenen Shortcut und kann bei der Fehlersuche sehr nützlich sein. Als Nerd können Sie wahrscheinlich schon am Namen erkennen, was ein Shortcut steuert.

Standardmäßig ist die Liste nach Shortcut-Namen geordnet. Man kann sie auch nach Werten sortieren, um etwa doppelt zugewiesene Shortcuts zu finden. Diese sind rot markiert.
Unerwünschte Shortcuts kann man mit der Rücktaste oder nach einem Rechtsklick mit der Delete-Option aus dem Menü löschen.

Standard Shortcuts
Resolume bringt von Haus aus einige voreingestellte Shortcut-Layouts mit, die wir für nützlich halten. Diese können Sie nach Bedarf modifizieren oder komplett ignorieren. Resolume ist Freiheit.
Werfen Sie einen Blick auf die Shortcuts für die APC40Mk2, APC Mini und NanoKontrol 2. Yo.