Blend Modes
Blend modes define how two layers* of video are mixed together.
They control how the pixels of one layer interact with the pixels underneath.
They are an essential tool for blending, compositing and transitioning your content.
In Arena & Avenue, blend modes are used to blend layers and effects. Additionally blend modes are used to set transition modes.
In Wire, nodes like Video Mixer, Transition and Texture Material use blend modes in various ways.
Whether you're layering footage, creating masks, or building feedback loops in Wire, understanding blend modes lets you control how visuals merge and interact.
Note: We will use layers, sources and pixels interchangeably in this article since there a lot of elements in the Resolume applications that use blend modes.
General Modes
General blend modes cover the most straightforward and commonly used ways to combine layers. They simply place one layer on top of another or preserve transparency. These modes are ideal when you need a predictable outcome or are a very boring person.
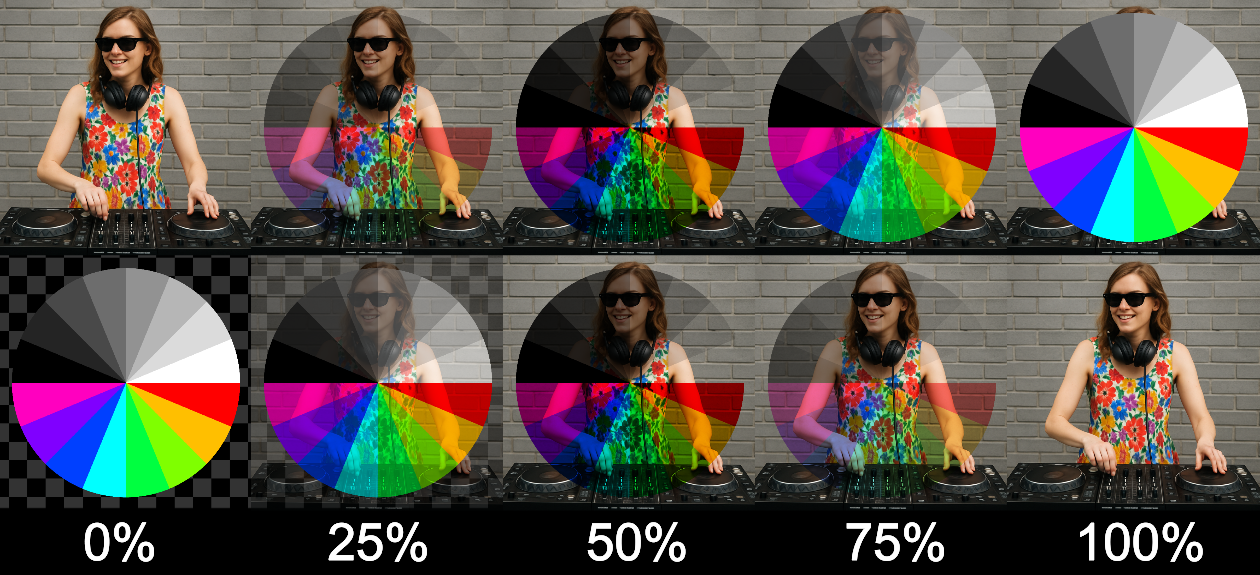
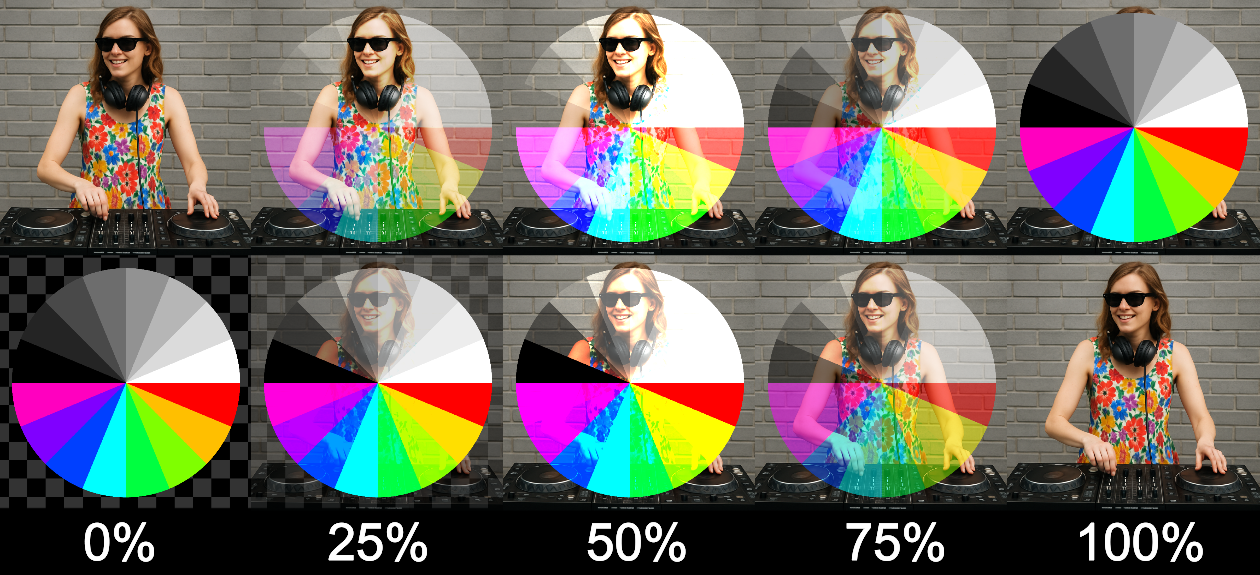
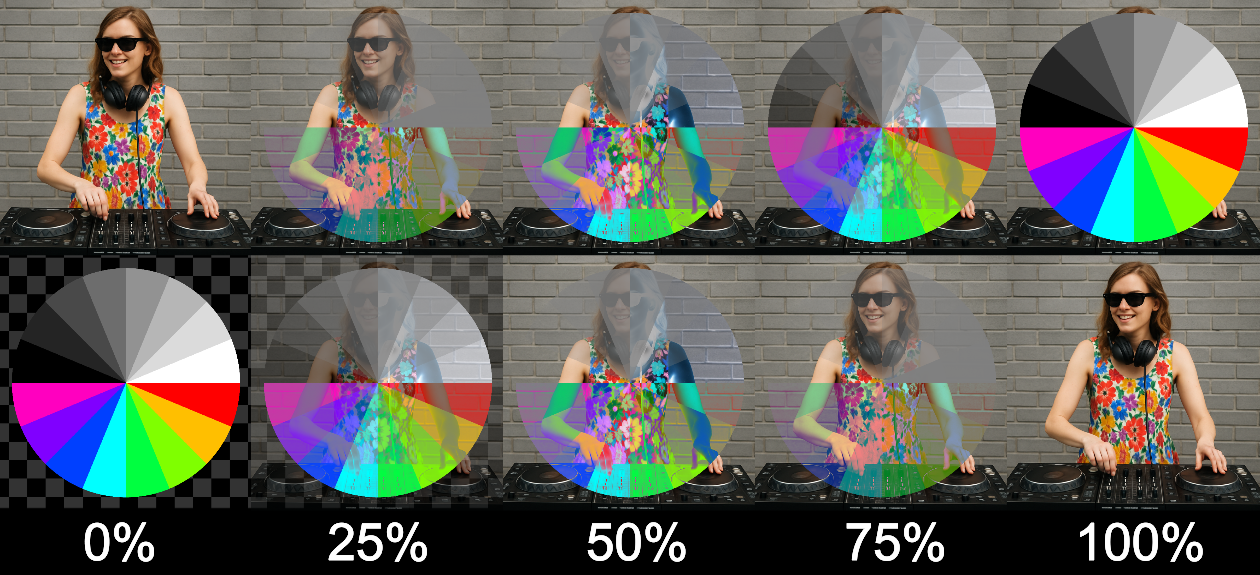
Alpha
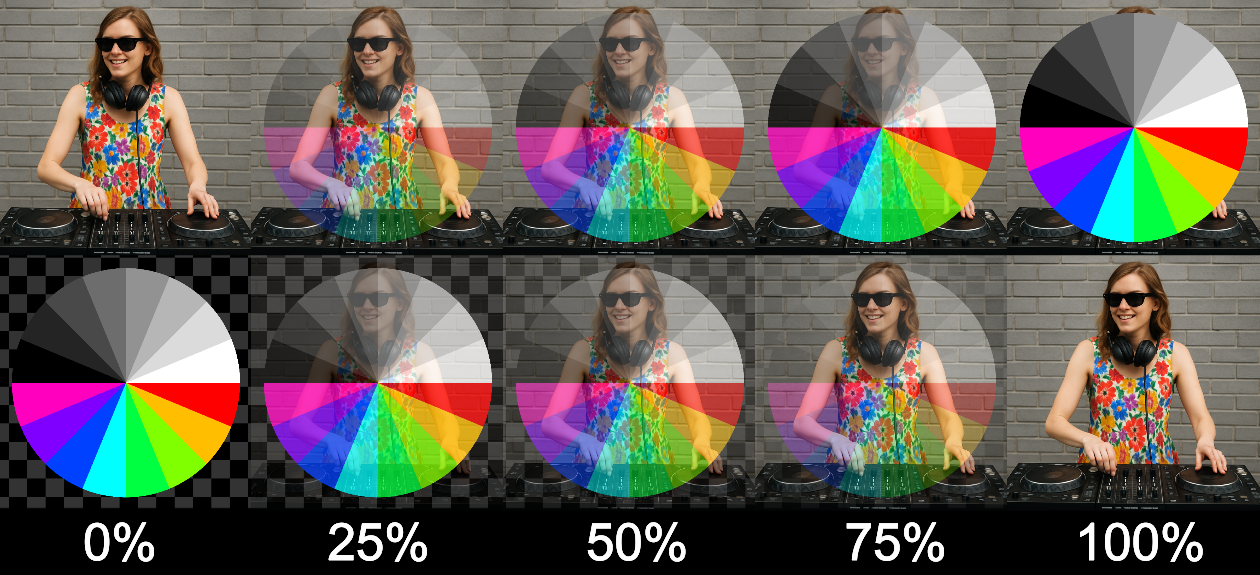
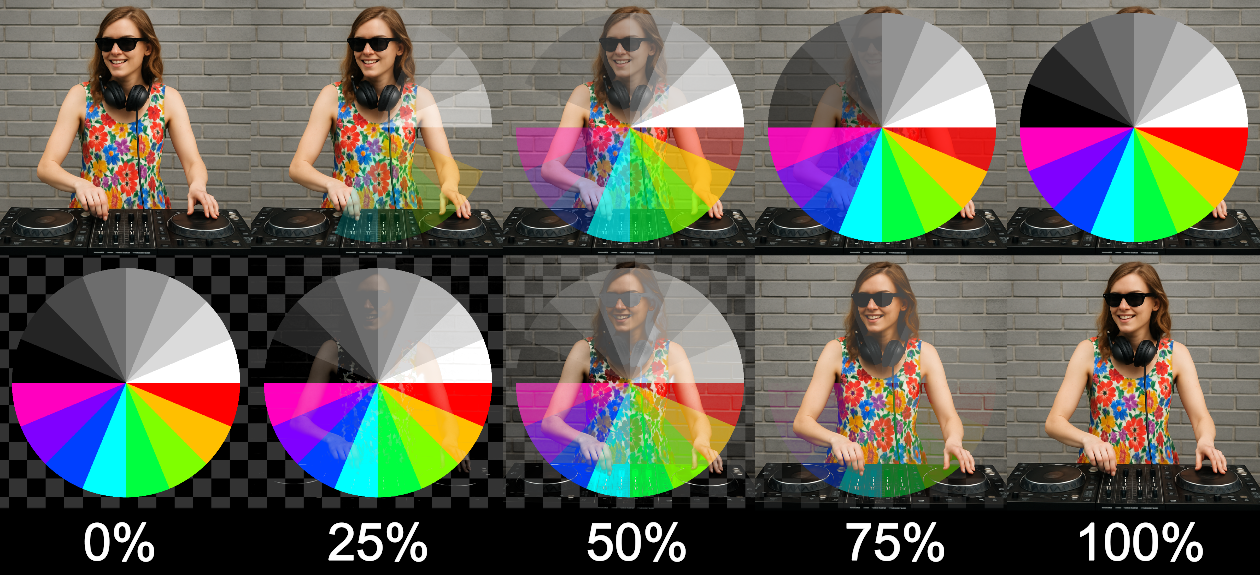
The Alpha blend mode mixes two layers based on opacity.
The more transparent a pixel is, the more the pixel below it shows through.
The more opaque it is, the more it covers the layer beneath.
This mode is often referred to as "Normal" in other software packages.
This is default blend mode of the Video Mixer node in Resolume Wire.
For a VJ, Alpha is a simple crossfade effect, but it often leads to dull grey-ish colors in the middle due to the opacity mixing.
But on the flip side, it blends edges smoothly, preserves soft transitions, and respects partial transparency.
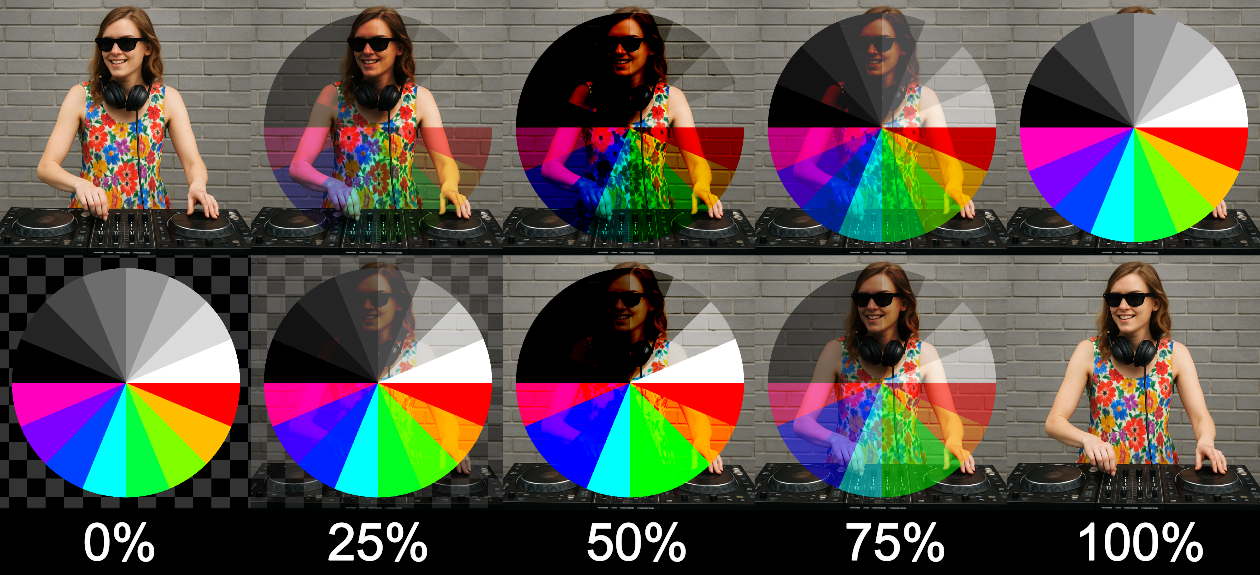
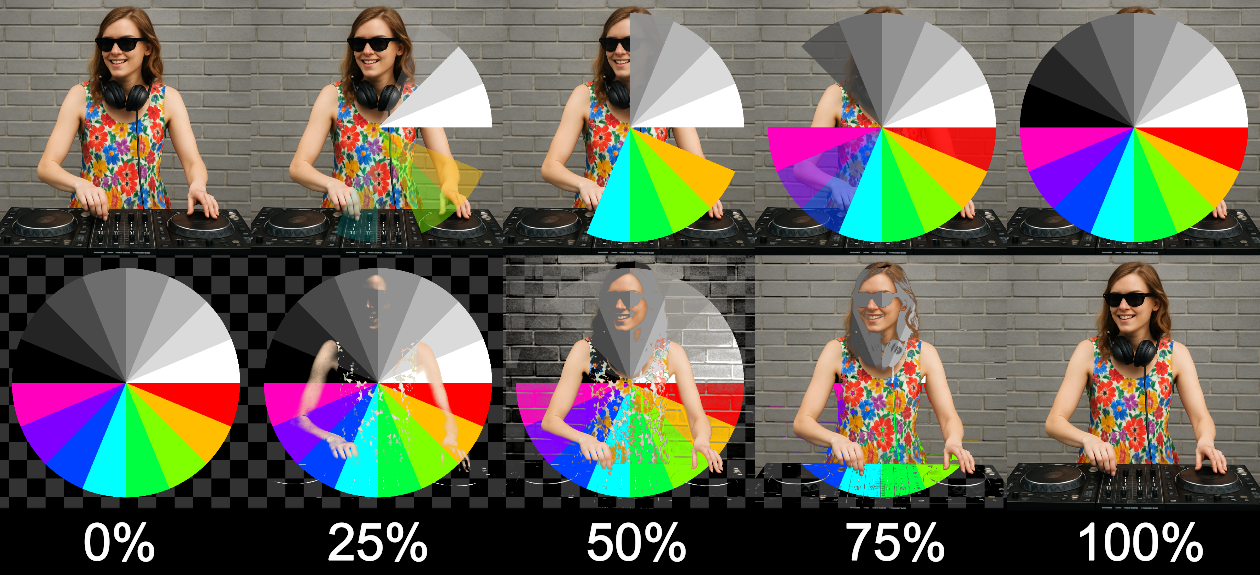
 AlphaCut
The Cut blend mode makes a hard cut from one signal to another. It is basically the ultimate anti-blend mode. Useful for harsh transitions, strobing with layers and triggering ADD.
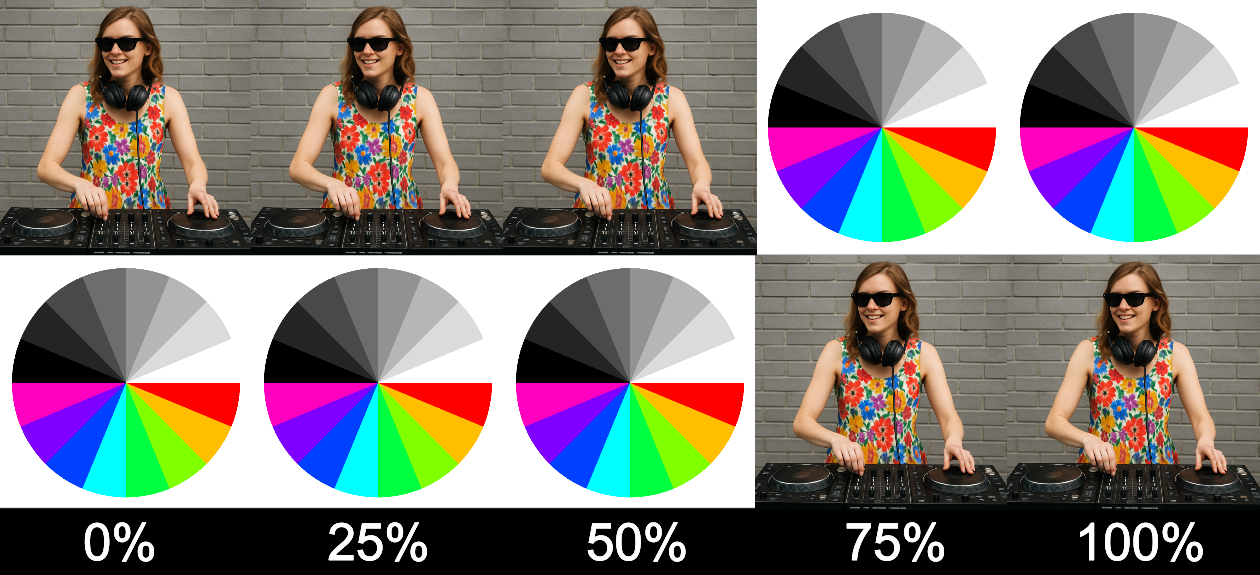 Cut
Cut
Darken Modes
Darken blend modes always produce a result that is darker than one or both of the input layers. These modes reduce brightness by filtering out lighter pixels or multiplying pixel values. They’re useful for creating shadows, deepening tones, or masking content based on brightness.
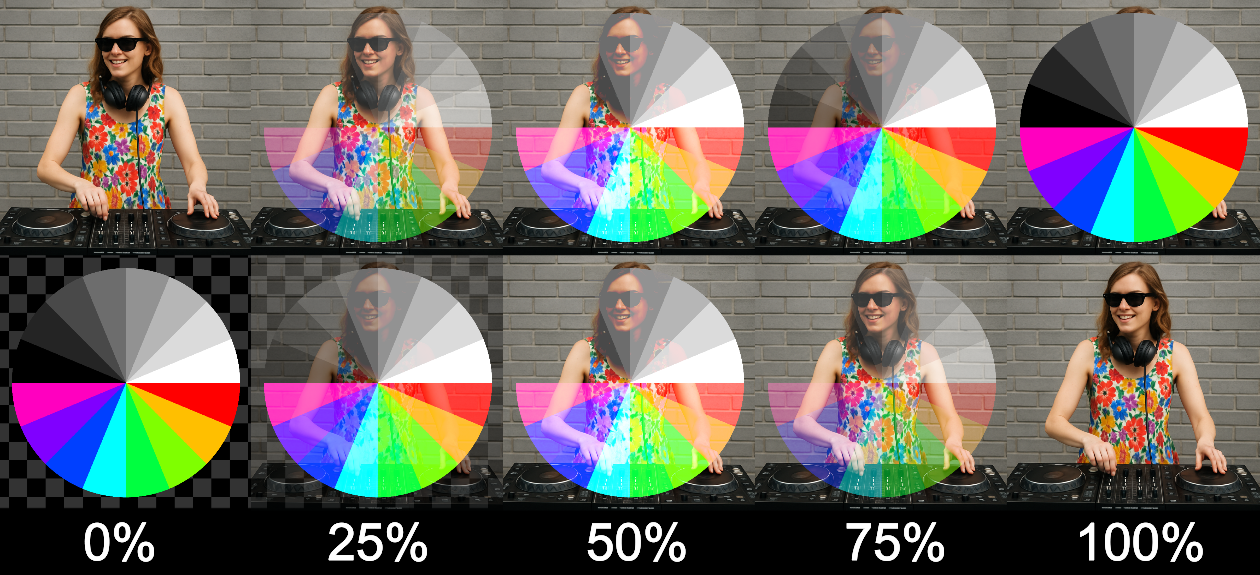
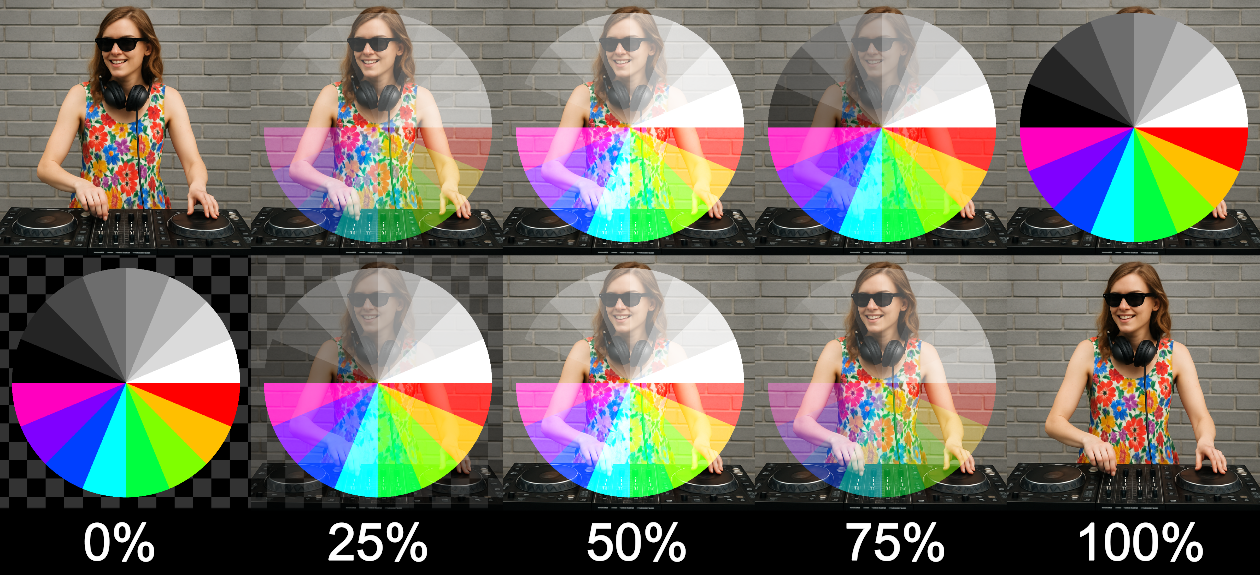
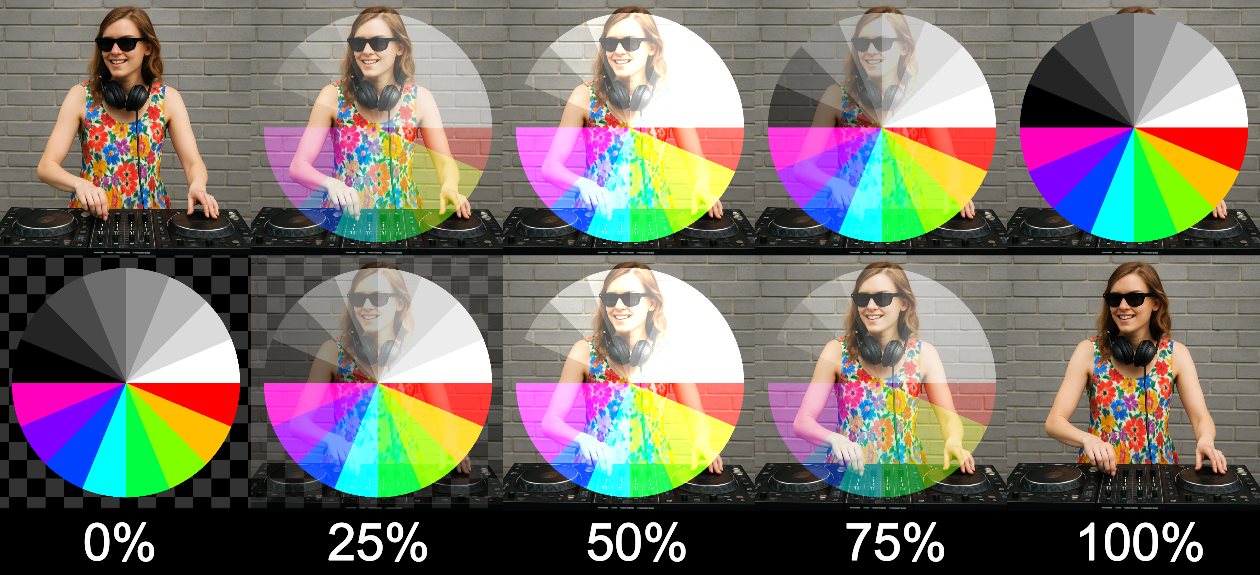
Darken
The Darken blend mode compares each pixel in the source and destination layers, and keeps whichever one is darker. No fancy math — just a simple comparison of brightness values.
If the source pixel is darker than the one below it, it replaces it. If not, it does nothing.
You can use Darken when you want to reveal darker elements from a top layer without affecting bright areas. Darken is also great when used with grungy textures, scratches and film grain.
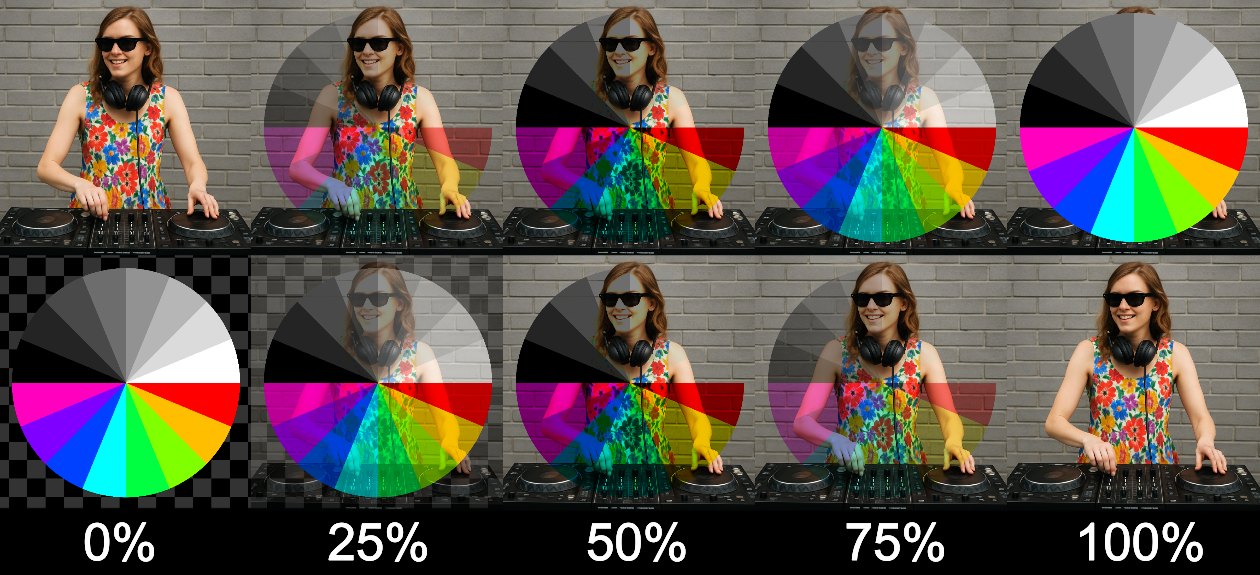 Darken
Multiply
The Multiply blend mode multiplies the red, green, blue, and alpha values of the source pixel with the destination pixel.
Because color values are stored as numbers between 0 and 1, the result is always darker than either input — unless one of them is white (value = 1), which acts like multiplying by 1.
Additionally this means that a black pixel, which has an RGB value of 0, 0, 0 will remove the other pixel from the result. Conversely, a white pixel, which has an RGB value of 1, 1, 1 will fully perserve the other pixel value.
In contrast to the Darken blend mode, the Multiply blend mode will affect color intensity
 Multiply
Burn
The Burn blend mode aggressively darkens the image by boosting contrast and reducing brightness. It's similar to Multiply, but more intense and more destructive, pushing colors into inky territory.
Burn in Resolume behaves like Color Burn in traditional compositing.
Use Burn when you require dark shadows with high contrast, You want a screen printing effect or want to impress your pyro-tech buddies.
 Burn
Burn
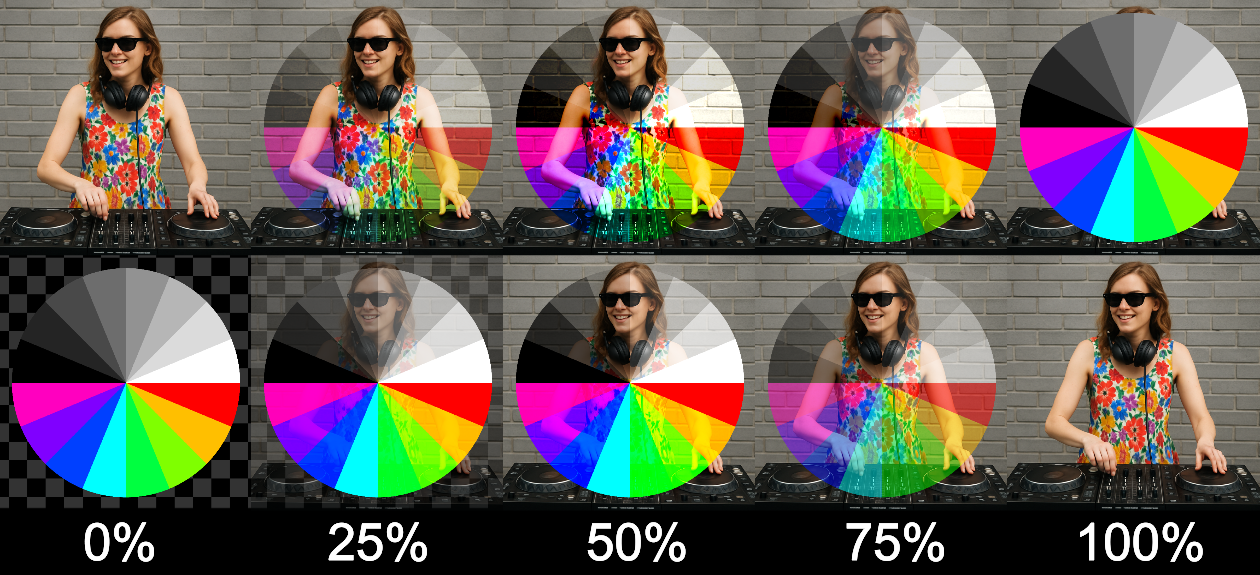
Lighten Modes
Lighten blend modes do the opposite of Darken modes — they brighten the final image by comparing and preserving the lighter values of each pixel. These modes are perfect for layering lighter textures, glowing elements, or bright highlights over a darker background.
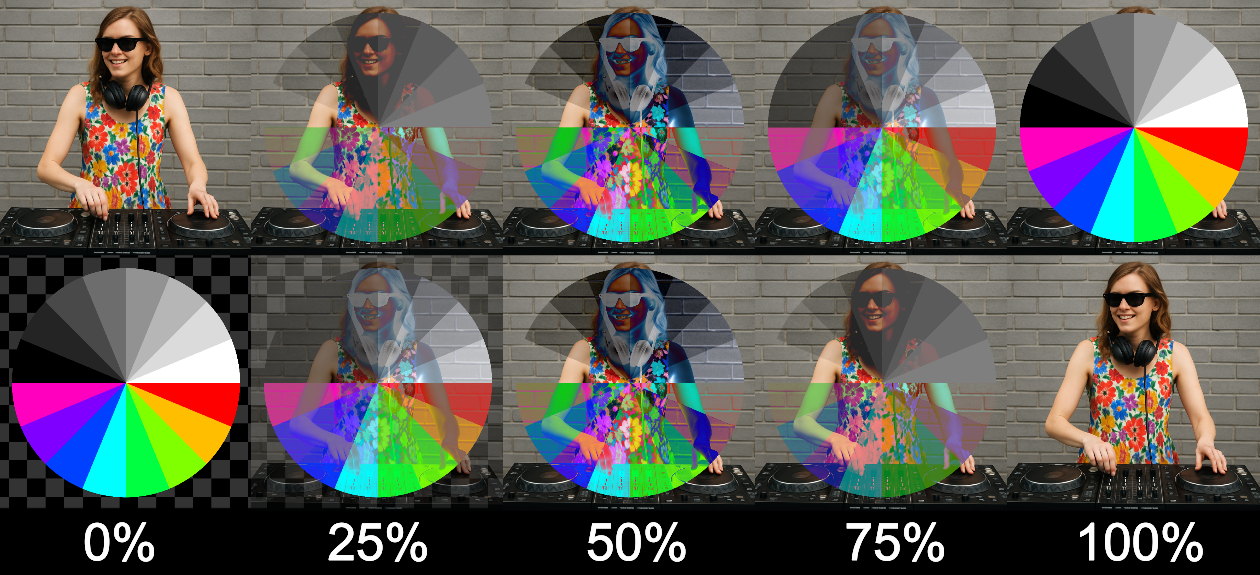
Lighten
The Lighten blend mode compares each pixel from the source and destination layers and keeps the brighter one. It’s the direct counterpart to the Darken mode and is great for layering highlights without overcomplicating the image.
You can think of Lighten as a “brightness-pass” filter: it lets the light through and ignores the shadows.
If the top layer has bright elements, they will appear over the bottom layer. If the top layer is darker, the bottom layer will show through.
Lighten is great when used with bright content like flares, explosions, blooms and neon elements. Addtionally Lighten can be used to preserve dark backgrounds on the bottom layer.
 Lighten
Screen
The Screen blend mode creates a brightening effect by inverting both source and destination pixels, multiplying them, and inverting the result again. That is nerd-speak for: it’s a soft, bright and clean look, that, at the right mix, creates a glow-like effect.
Unlike Lighten, which chooses a brighter pixel, Screen combines both layers, so light areas become lighter and dark areas fade away.
Screen is good when you want a dreamy or ethereal overlay of your content and works really well with black backgrounds.
 Screen
Dodge
The Dodge blend mode (short for Color Dodge) intensifies brightness by dividing the destination pixels by the inverted source pixels. It results in a bright, high-contrast flash effect that can easily blow out highlights.
It’s similar to Screen but far more intense: brighter whites, less subtlety, and more visual punch. It creates dramatic results, often with an overexposed feel.
This blend mode is great for creating overexposed film looks, light leaks, lightning and strobes. Keep in mind that Dodge can quickly cause whiteouts when left unchecked.
 Dodge
Dodge
Contrast Modes
Contrast blend modes combine elements of both darkening and lightening. They darken the dark areas and brighten the bright ones, depending on the blend amount and the base pixel values. These modes are punchy and ideal for adding intensity and depth.
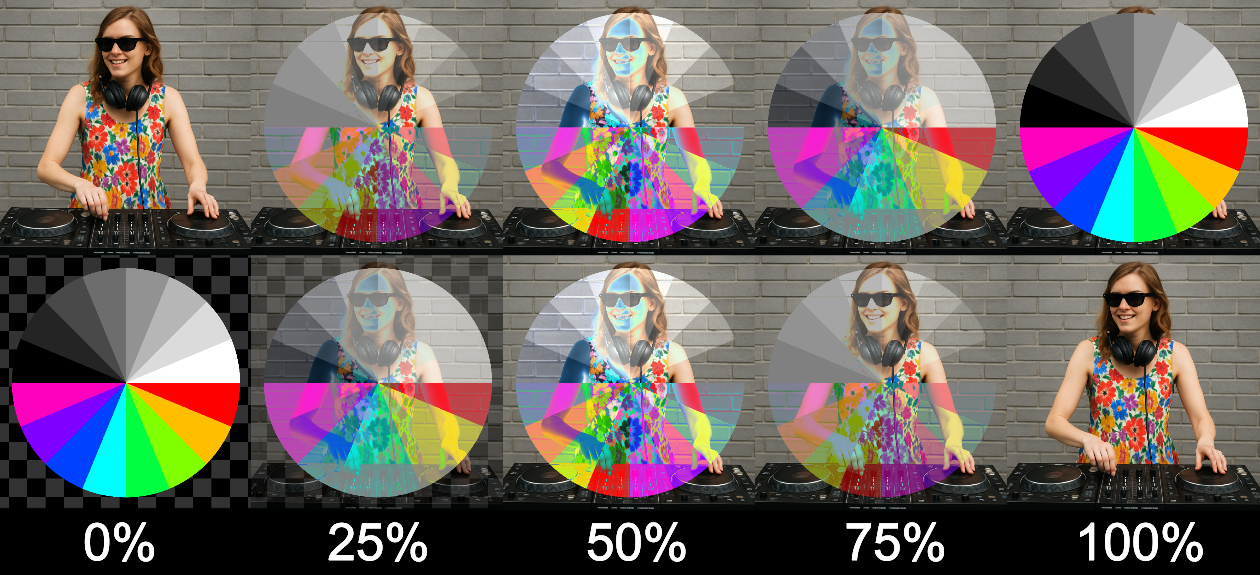
Overlay
The Overlay blend mode applies either Multiply and Screen to each pixel. It looks at the brightness of the base pixel and if this is darker than 50% grey, it applies Multiply, if not, it applies Screen.
The result is high-contrast as the darks get darker, lights get lighter, while midtones stay mostly intact.
While VJ'ing, Overlay is perfect for making things feel "printed" or "burned into" the background. Additionally Overlay is great when blending footage with mid-range brightness like skin tones or footage captured on a phone.
 Overlay
Soft Light
The Soft Light blend mode is the gentler sibling of Overlay. It still reacts to the brightness of the base layer but does so with a softer, more natural contrast curve.
Bright areas become slightly lighter, dark areas slightly darker, but without the dramatic edge or saturation spike of Overlay or Hard Light.
 Soft Light
Hard Light
The Hard Light blend mode is Overlay in reverse.
It looks at the brightness of the source pixel instead of the base.
Bright source pixels lighten the base (like Screen).
Dark source pixels darken the base (like Multiply).
The result is intense, especially with high-contrast or strobing footage.
This makes it one of the most aggressive contrast modes if used properly.
While VJ'ing you can use Hard Light when you want to create a bold mix.
This style goes really well when mixing patterns, strobes and video together, but it will never be subtle!
 Hard Light
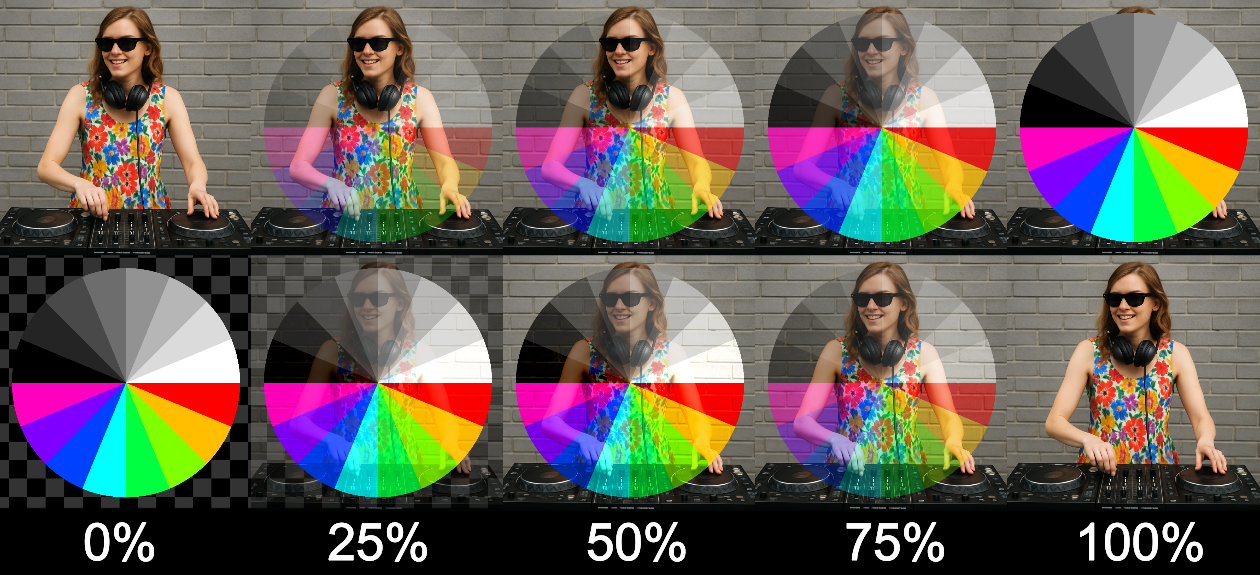
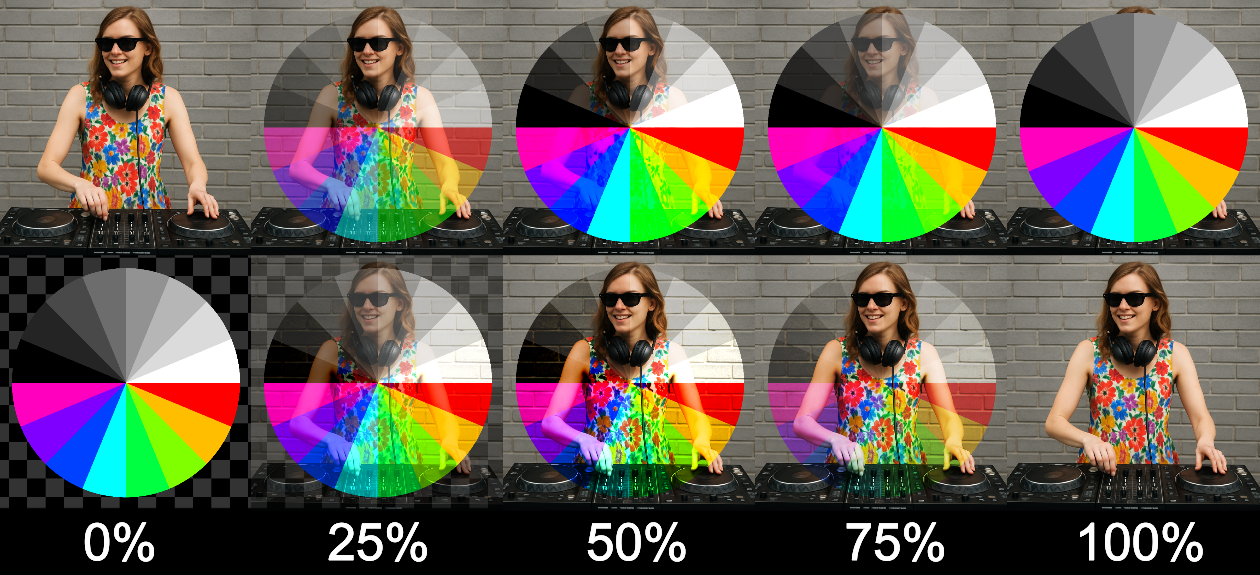
Comparative Modes
Comparative blend modes use pixel-by-pixel mathematical comparisons to combine two signals. The blend determines how much of the source pixel is used in the result. These modes are great when you want the content of one layer to act as a mask, difference map or displacement map for another.
Add
The Add blend mode adds the color values of the source and destination pixels together. This results in a brighter composite image, often producing intense highlights or fully blown-out whites when both layers have bright areas.
This is Arena & Avenue's default blend mode.
Be mindful of clipping while using Add.
Bright visuals can quickly max out at white.
 Add
Add
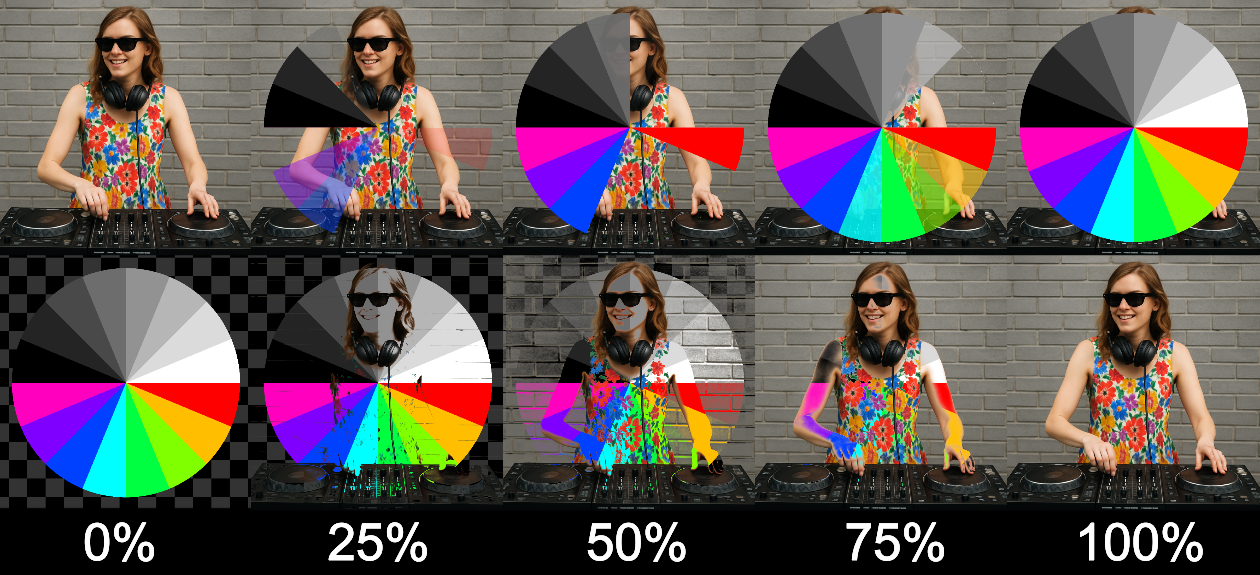
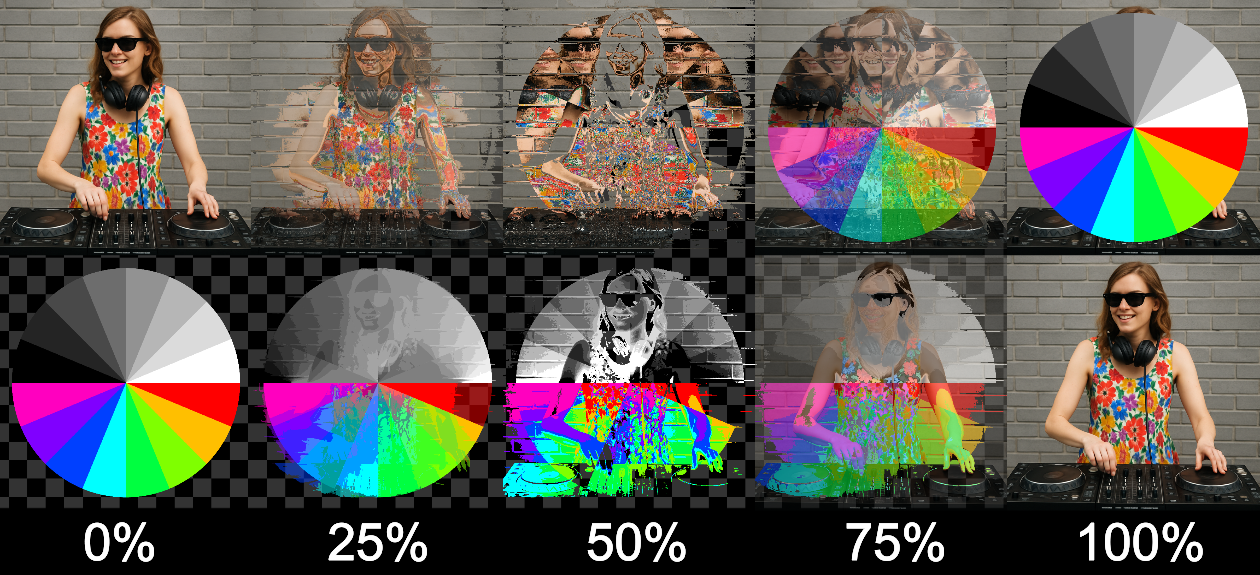
Subtract
The Subtract blend mode removes the source pixel’s color value from the destination pixel. This tends to create darker image with unexpected inversions or color shifts.
Unlike Darken, which compares pixels and keeps the lowest, Subtract does a simple subtraction of the destination’s brightness. This can make Subtract very unpredictable since even the most experienced VJ's still haven't reached RGBA Nirvana where one thinks, eats, breaths and feels in color channels.
Use Subtract when you want edgy, glitchy, or experimental blends.
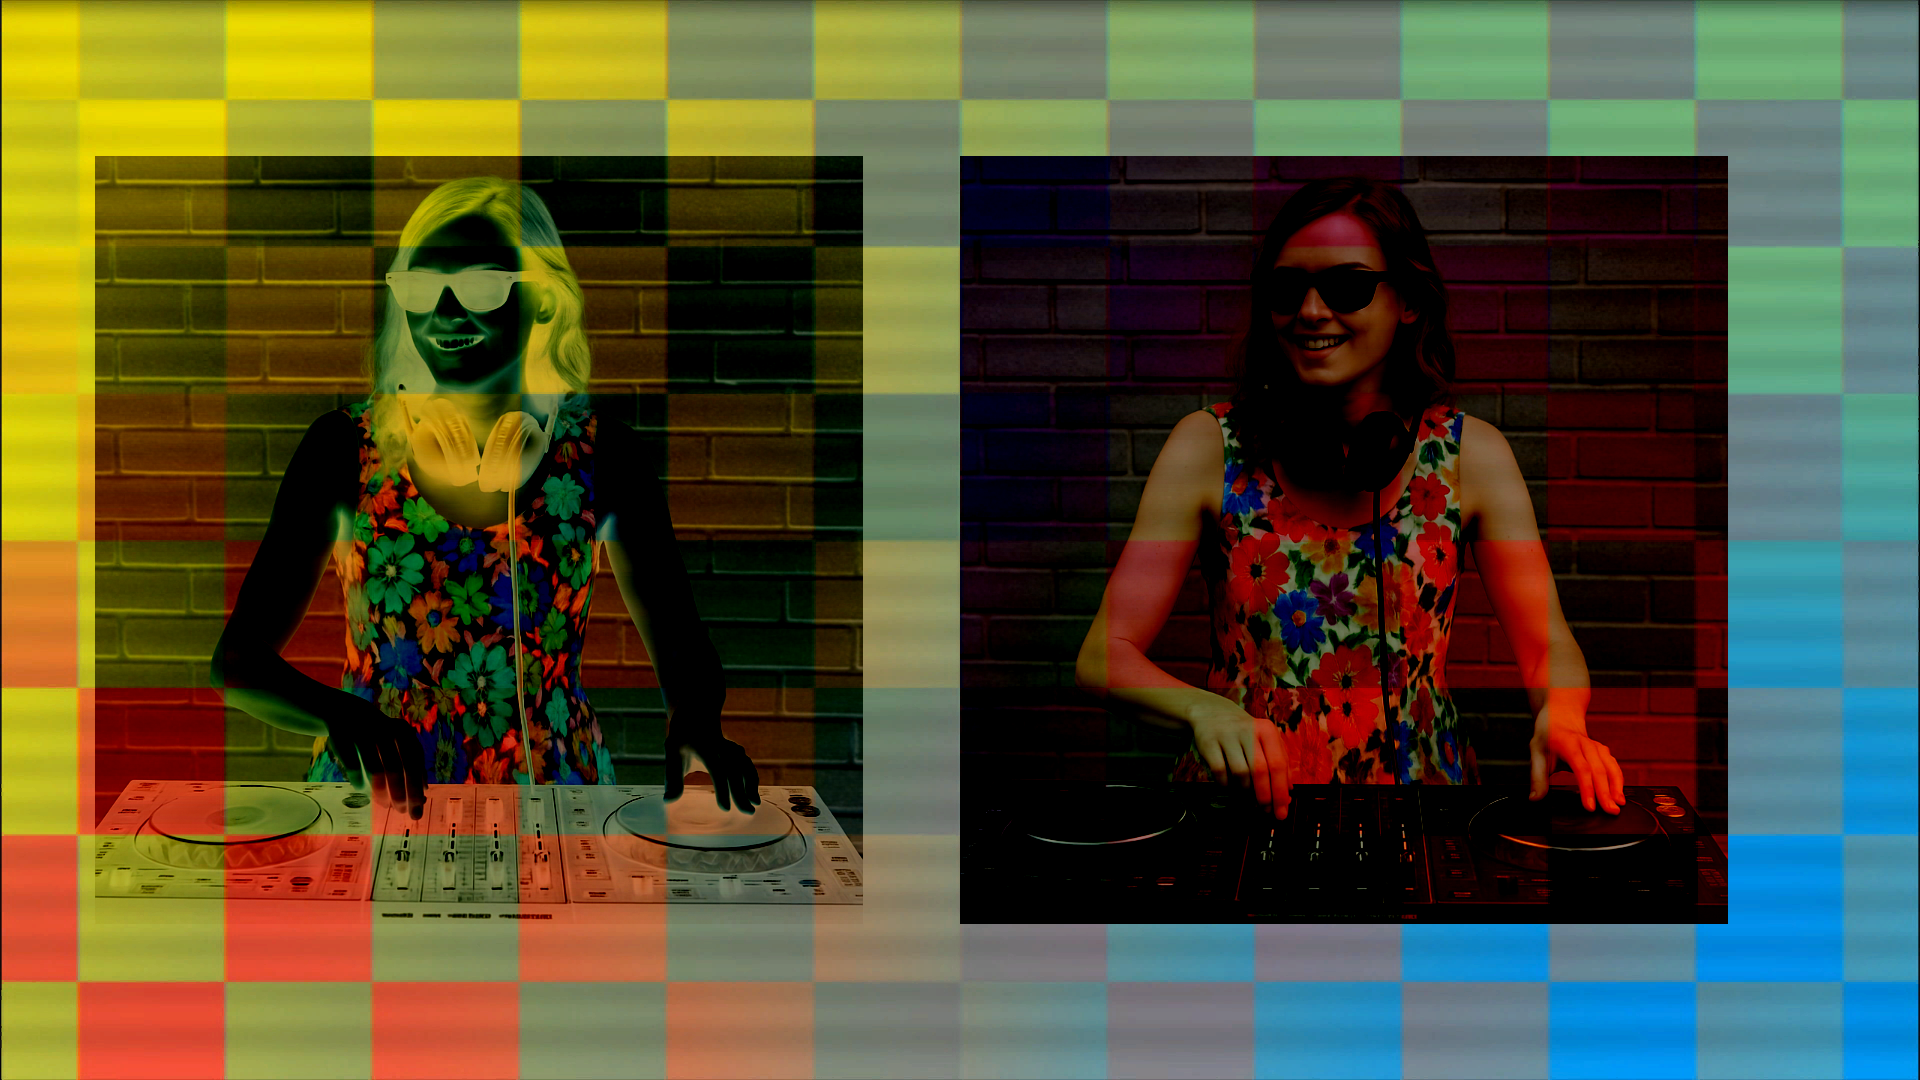 Left: Subtract 50% DJ Girl from Background
Right: Subtract 50% Background from DJ Girl
Difference
The Difference blend mode subtracts the color value of the source pixel from the destination pixel — or vice versa — depending on which one is brighter.
Identical pixels (same color and brightness) turn black and opposite pixels (e.g., white and black) turn white. Mid-tones and movement between layers create a psychedelic effect as values shift and cancel each other out.
The Difference mode really shines when your layers have similar compositions but slightly different timing. For example: two versions of the same clip with a slight offset or color tint. The result will flicker and morph based on what's different frame by frame.
You might also have noticed that there is a Difference I Blend mode.
This is the inverted version of this blend mode and generally results in a lighter image.
 Difference
 Difference I
Exclusion
Exclusion is similar to Difference, but with softer, more washed-out results. It still subtracts pixel values, but with a less dramatic curve, resulting in low-contrast blend.
When the source and destination pixels are similar, the result is dark.
When they differ, you get lighter areas, but with a more muted, inverted look than Difference.
Exclusion can be used if ou want subtle color inversion without harsh contrast or dwell in the "Negative Film" vibe.
 Exclusion
Composite Modes
Composite blend modes handle more advanced layering interactions, often involving alpha channels, luminance keys, or masking logic. These modes are especially useful for cutting out parts of a layer based on brightness or transparency, or for blending layers based on specific visual rules like luma or chroma keys.
Luma Key
Luma Key uses the brightness (luminance) of the source layer to determine which pixels are visible. Bright pixels stay; dark ones become transparent or vice versa, depending on whether you use Luma Key or Luma Key I (inverted)
It’s a keying operation, letting you cut out parts of an image based on brightness.
 Luma Key
 Luma Key I
Luma is Alpha
Luma is Alpha uses the luminance of a pixel as alpha.
Essentially turning brightness into an alpha channel.
Bright areas become opaque, dark areas become transparent.
It’s like turning a black-and-white video into a mask for itself.
 Luma is Alpha
Displace
Displace doesn’t blend visuals at all, instead it horizontally shifts pixels based on the color values of the source layer. It’s a distortion effect, where the source acts like a displacement map, warping the image underneath.
Displace is awesome for creating ripples, warps and distortion effects. Get your glitch on!
 Displace
50Mask
50Mask is a blend mode where white pixels are fully visible, black pixels are fully transparent, and gray pixels are the blend.
50 Mask is often used as an alternative to using masking layers by those who prefer to work that way. This can be an advantage since each clip can have its own blend mode, allowing you to place masks and content on the same layer
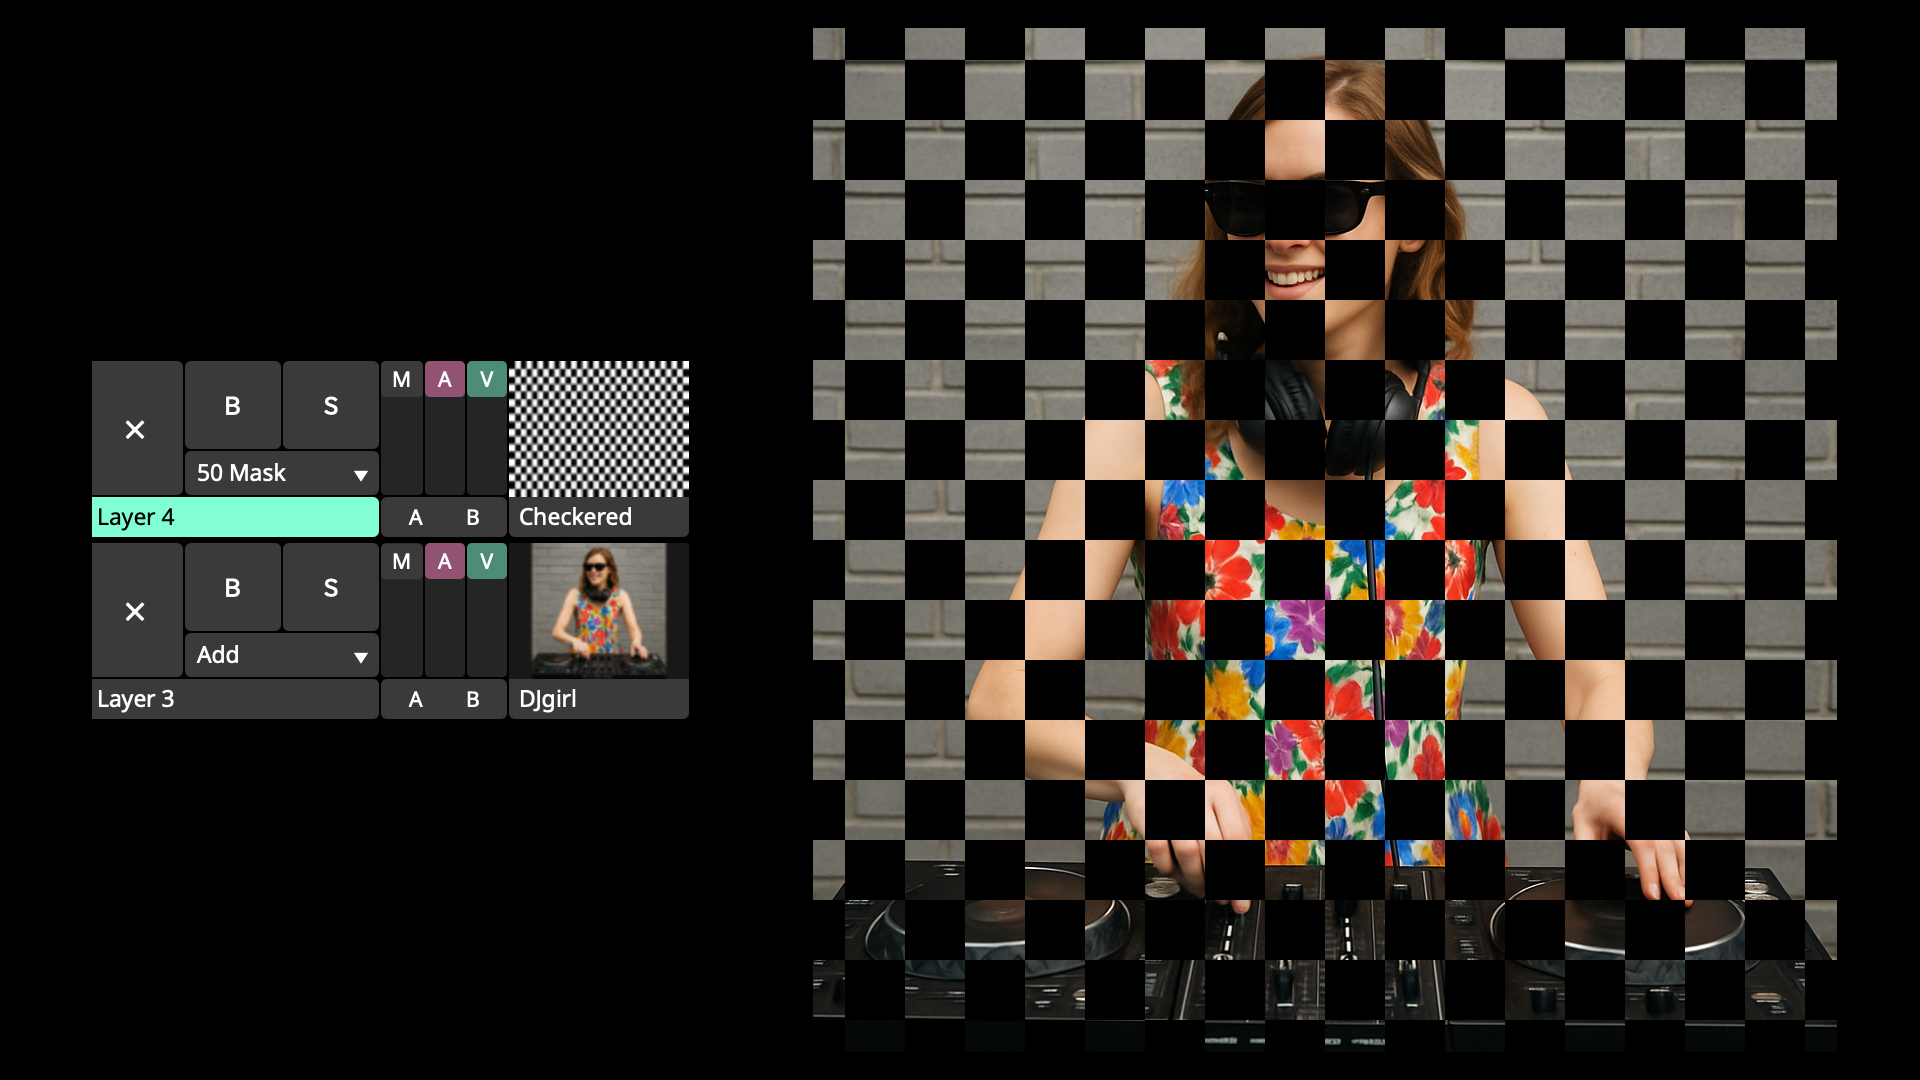 50 Mask
RGB
The RGB blend mode gradually removes the Blue, Green and Red channels until the layer is fully revealed.
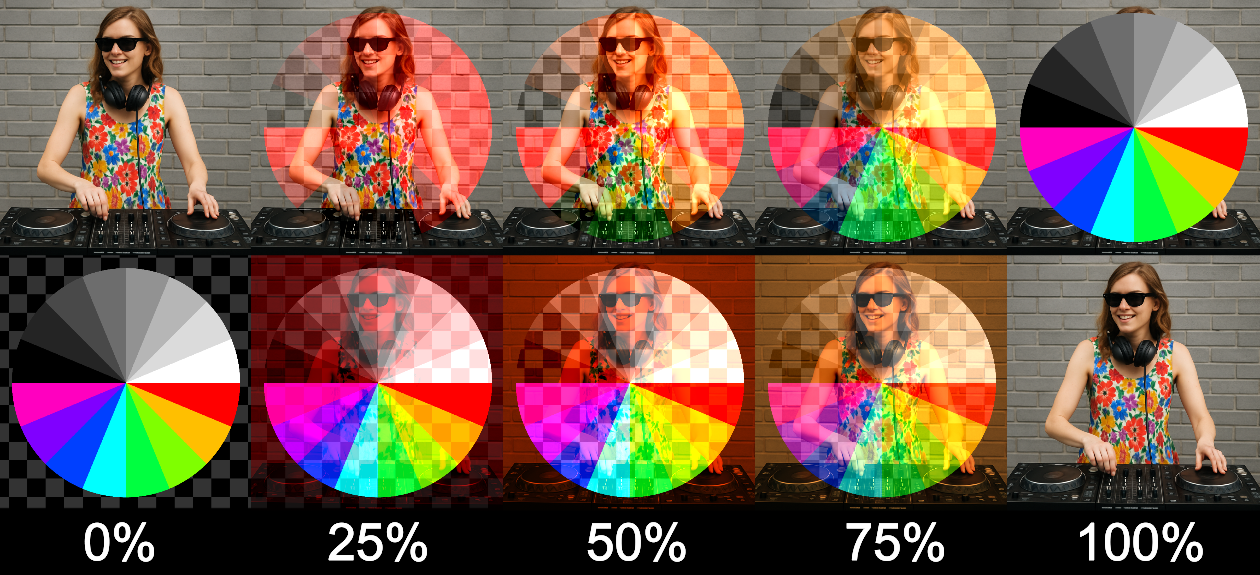 RGB
RGB
Transition Modes
Thera are many blend modes in Arena and Avenue that are used to create transitions.
They include wipes, slides, and dissolves that animate from one layer to another.
These modes are great for switching between clips or revealing elements over time.
Since you are a super clever VJ, you can probably figure out the difference between "Wipe Left" and "Wipe Up", so we won't be explaining any of these modes. Just give them a try!
 Wipe Ellipse
 Dissolve
 Push Up